How to Make Homemade Applesauce - Easily! With Step-by-step Photos, Recipe, Directions, Ingredients and Costs
This month's notes: July 2026: Stored US apples are still available. See your state's crop availability calendar for more specific dates of upcoming crops.
Valentine's Day - February 14 - See this website for Valentines Day history, facts and top picks for fast, easy, inexpensive gifts for the man, woman or children in your life!
Easter will be April 16, 2017 - if you want to take your children to a free Easter egg hunt - see our companion website to find a local Easter Egg hunt!
And we have home canning, preserving, drying and freezing directions. You can access recipes and other resources from the drop down menus at the top of the page or the site search. If you have any questions or suggestions, feel free to write me! Also make your own ice cream; see How to make ice cream and ice cream making equipment and manuals. Have fun, eat healthier and better tasting, and save money by picking your own locally grown fruit and vegetables, and then using our easy directions
 Subscribe
to our: Email
alerts; Follow us on Twitter
Add
this page to your favorites! -
Email this page to a friend, or to yourself
Subscribe
to our: Email
alerts; Follow us on Twitter
Add
this page to your favorites! -
Email this page to a friend, or to yourself
How to Make Homemade Applesauce
 You
think making and canning your own applesauce or jam is difficult or
expensive? Not at all! Here's how to do it, complete instructions in easy
steps and completely illustrated. The applesauce will taste MUCH better than
anything you've ever had from a store, and by selecting the right apples, it
will be so naturally-sweet that you won't need to add any sugar at all.
You
think making and canning your own applesauce or jam is difficult or
expensive? Not at all! Here's how to do it, complete instructions in easy
steps and completely illustrated. The applesauce will taste MUCH better than
anything you've ever had from a store, and by selecting the right apples, it
will be so naturally-sweet that you won't need to add any sugar at all.
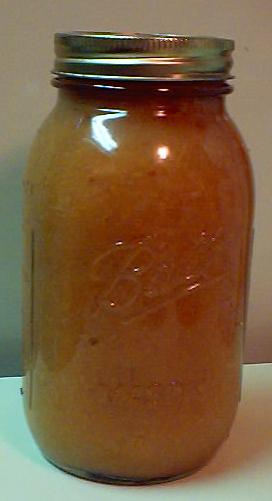
Prepared this way, the jars have a shelf life of 18 months to 2 years, and require no special attention.
I learned years ago how to make jam and applesauce watching my mother and grandmother when I was a child. My grandmother and mother always made it, and now if I want it, I've got to make it myself (funny how that growing up stuff works?)
And here's how you can, too. If you don't want to can the applesauce, but just want some fresh for a meal; see how to make applesauce for a meal (not canning it) with NO special equipment.
Directions for Making Applesauce
Ingredients and Equipment
|
|
Recipe and Directions
 Step
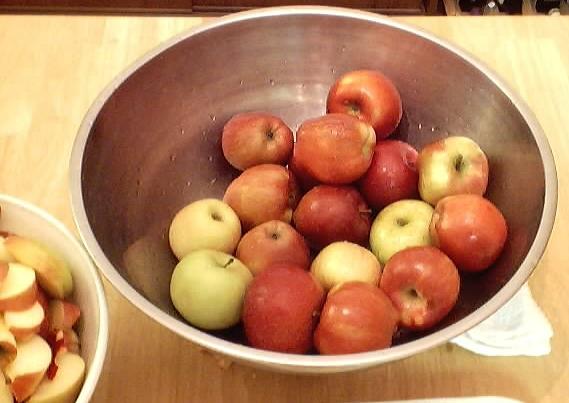
1 - Selecting the apples
Step
1 - Selecting the apples
The most important step! You need apples that are sweet - NOT something like Granny Smith's. Yeah, I know you like them (why do sweet women like sour apples???) and even if I did, they still wouldn't make good applesauce - you'd have to add a lot of sugar.
Instead, choose apples that are naturally sweet, like Red Delicious, Gala, Fuji, Rome and always use a mixture - never just one type. This year I used 4 bushels of red delicious and one each of Fuji, Yellow Delicious, Gala and Rome. This meant it was so sweet I did not need to add any sugar at all. And the flavor is great! The Fuji's and Gala's give it an aromatic flavor! Honeycrisp and Pink Lady are also excellent, sweet, flavorful apples.
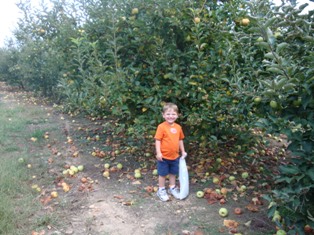
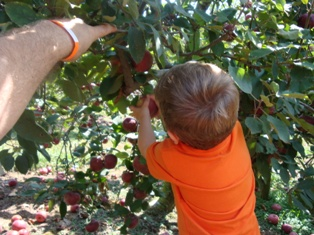
Step 2 - How many apples and where to get them
You can pick your own, or buy them at the grocery store. But for large quantities, you will find that real* farmer's markets, like the Farmer's Market in Forest Park, Georgia have them at the best prices. In 2004, they were available from late September at $11 to $16 per bushel. 2005 prices have been in the $14 to $20 range at the real farmer's markets, like the Atlanta-Forest park Georgia State Farmer's Market and orchards in the southeast of the U.S.
You will get about 12 to 16 quarts of applesauce per bushel of apples. Count on 13 or 14 quarts per bushel.
* - not the cutesy, fake farmer's markets that are just warehouse grocery stores that call themselves farmer's markets.
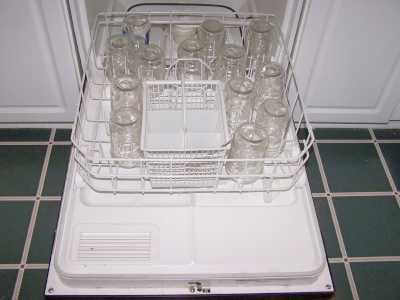 Step
3 - Wash the jars and lids
Step
3 - Wash the jars and lids
Now's a good time to get the jars ready, so you won't be rushed later. The dishwasher is fine for the jars; especially if it has a "sanitize" cycle, the water bath processing will sanitize them as well as the contents! If you don't have a dishwasher with a sanitize cycle, you can wash the containers in hot, soapy water and rinse, then sanitize the jars by boiling them 10 minutes, and keep the jars in hot water until they are used. Leave the jars in the dishwasher on "heated dry" until you are ready to use them. Keeping them hot will prevent the jars from breaking when you fill them with the hot applesauce.
Put the lids into a pan of hot, but not quite boiling water (that's what the manufacturer's recommend) for 10 minutes, and use the magnetic "lid lifter wand" to pull them out.
 Step
4 -Wash and chop the apples!
Step
4 -Wash and chop the apples!
I'm sure you can figure out how to wash the apples in plain cold water.
Chopping them is much faster if you use one of those apple corer/segmenters - you just push it down on an apple and it cuts it into segments. Note: You do not peel the apples! You will put the entire apple into the pot to cook.
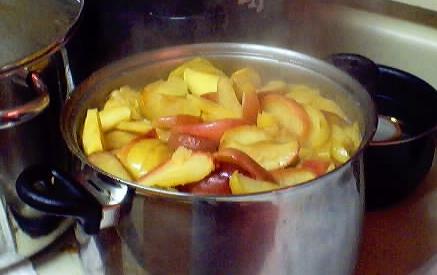 Step
5 - Cook the Apples
Step
5 - Cook the Apples
Pretty simple put about 1 inch of water (I used either filtered tap water or store brand apple juice) on the bottom of a huge, thick-bottomed pot. Put the lid on, and the heat on high. When it gets really going, turn it to medium high until the apples are soft through and through.
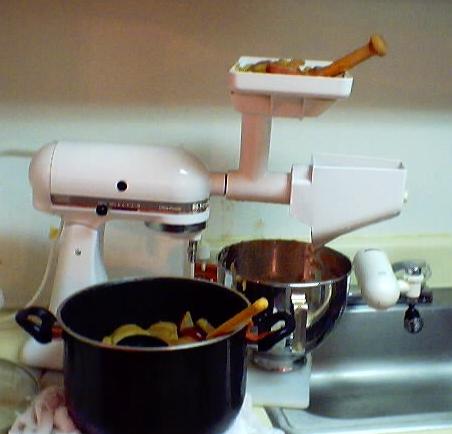 Step
6 - Sieve the cooked apples
Step
6 - Sieve the cooked apples
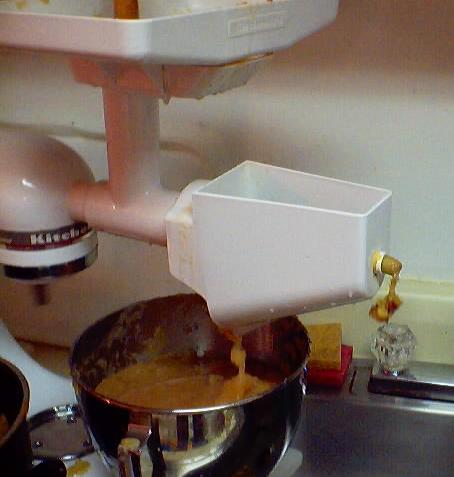
There are two ways to squish the apples through a sieve, either through a :
- hand-cranked Foley food mill (about $20 see this page or
- through a KitchenAid sieve/grinder (with the attachments, about $300, but it lasts a lifetime).
See here for related tools, equipment, supplies on AmazonSee here for related tools, equipment, supplies on Amazon
See here for related tools, equipment, supplies on Amazon
See here for related tools, equipment, supplies on Amazon
See here for related tools, equipment, supplies on Amazon

You CAN also use a simple metal sieve, but it will be VERY tedious, hard work - if you plan on making applesauce every year, spring for the 25 bucks for the foodmill.
Basically, you put the cooked apples (including the skins, seeds, cores and stems) into the top hopper, and use the wooden plunger to push it in.
NOTE for those on a VERY tight budget or making just a small batch of applesauce
 You
CAN make applesauce without a food processor or a $25 foodmill, but it's
much more work, and really only suitable for making a quart or two of
applesauce at a time... but it can be done - click here for the directions on making applesauce with NO special
equipment
You
CAN make applesauce without a food processor or a $25 foodmill, but it's
much more work, and really only suitable for making a quart or two of
applesauce at a time... but it can be done - click here for the directions on making applesauce with NO special
equipment
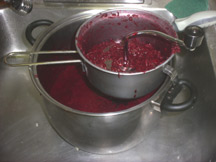
The device pushes it against a sieve and the applesauce comes
out underneath (in the chrome pot in the photo at left ), and the debris
shoots out the side into the sink - see photo below.
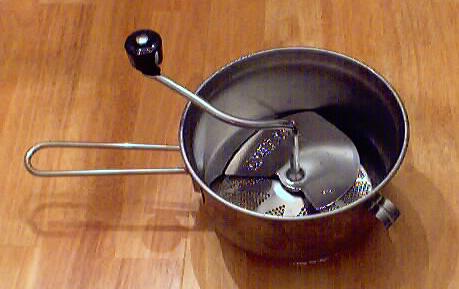 If
the idea of shelling out about $200 for KitchenAid, plus the additional
$120 for the grinder / sieve attachment doesn't appeal to you, you can still
make applesauce using a Foley Food Mill, pictured at right. You can order
one here for much less than I've seen them elsewhere (see the link below the
picture at right and click for more info). Obviously, you have to crank it
by hand, which is ok if you have child labor and aren't making a lot. If
you are only making a dozen or two jars or don't have other uses for a
KitchenAid, then this is a practical alternative.
If
the idea of shelling out about $200 for KitchenAid, plus the additional
$120 for the grinder / sieve attachment doesn't appeal to you, you can still
make applesauce using a Foley Food Mill, pictured at right. You can order
one here for much less than I've seen them elsewhere (see the link below the
picture at right and click for more info). Obviously, you have to crank it
by hand, which is ok if you have child labor and aren't making a lot. If
you are only making a dozen or two jars or don't have other uses for a
KitchenAid, then this is a practical alternative.
There is also a VERY nice, versatile strainer pictured at far right! Click on the links there or see the bottom of this page for more information and to order! The VillaWare model can handle higher volumes than a Foley food mill (without giving you cramps!)
See here for related tools, equipment, supplies on Amazon See here for related tools, equipment, supplies on Amazon To see a greater variety of strainers in other types, sizes, and prices, click here!
 Step
7 - Season and keep the applesauce hot
Step
7 - Season and keep the applesauce hot
Put the applesauce into a large pot. Add cinnamon to taste. You should not need to add any sugar.
The applesauce does not need any further cooking; just keep it hot until you get enough made to fill the jars you will put into the canner (Canners hold seven jars at once, whether they are quart or pint size)
 Step
8 - Fill the jars and process them in the water bath
Step
8 - Fill the jars and process them in the water bath
Fill them to within 1/4-inch of the top, wipe any spilled applesauce of the top, seat the lid and tighten the ring around them. Put them in the canner and keep them cover with at least 1 inch of water and boiling. if you are at sea level (up to 1,000 ft) boil pint jars for 15 minutes and quart jars for 20 min. If you are at an altitude of 1,000 feet or more, see the chart at the bottom of this page.
 Step
9 - Remove and cool the jars - Done
Step
9 - Remove and cool the jars - Done
Lift
the jars out of the water and let them cool without touching or bumping
them in a draft-free place (usually takes overnight) You can then
remove the rings if you like, but if you leave them on, at least loosen
them quite a bit, so they don't rust in place due to trapped moisture.
Once the jars are cool, you can check that they are sealed verifying
that the lid has been sucked down. Just press in the center, gently,
with your finger. If it pops up and down (often making a popping sound),
it is not sealed. If you put the jar in the refrigerator right away, you
can still use it. Some people replace the lid and reprocess the jar,
then that's a bit iffy. If you heat the contents back up, re-jar them
(with a new lid) and the full time in the canner, it's usually ok.
Other Equipment:
From left to right: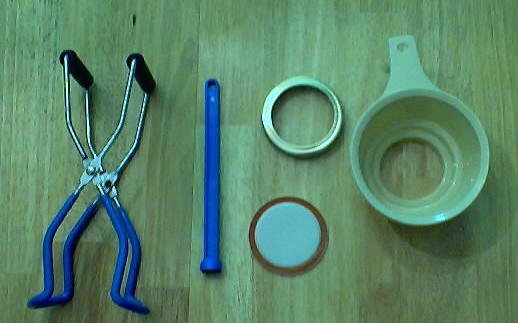
- Jar lifting tongs to pick up hot jars
- Lid lifter - to remove lids from the pot of boiling water (sterilizing )
- Lids- disposable - you may only use them once
- Ring - holds the lids on the jar until after the jars cool - then you remove them, save them and reuse them
- Canning Jar funnel - to fill the jars
FAQs - Questions and Answers About Making Applesauce
Q. Can I use a JuiceMan or Vitamix instead of the grinder/sieve? The Juiceman will 'spit out' the pulp and seeds, but the Vitamix uses everything. This is my first time making applesauce and I really don't want to mess it all up.
A. It sounds like the Vitamax isn't appropriate: I'm not sure many people want to eat ground up seeds, stems and cores. In my humble opinion, that's carrying "eat some fiber" to an extreme! :) And it would mostly likely adversely affect the taste.
The Juiceman might work. If it ejects the seeds, stems and hard parts of the core, while allowing the edible apple pulp to pass through, that's what you want.
Since it appears to be designed to "juice" fruit, the applesauce might be ultra-smooth; which could be either a positive or a negative, depending upon your preferences.
Finally, the inclusion of skins in the final product is debatable. The naturalists (hmm, and frugal folks, too) will argue that the skins could and should be ground up and included, as that increases the yield of the applesauce and that's "where the nutrition is" (a statement that I haven't yet seen from credible source, like a major university food science lab). Of course, if any fungicides or pesticides are used, they concentrate in the skin (remember the controversy over Alar?)
If the apples are grown without the use of pesticides or fungicides, then the only concern is the taste, but who knows, you may prefer it with the skins ground in. You don't know till you try!
|
|||||||||||||||||||||||||||||