
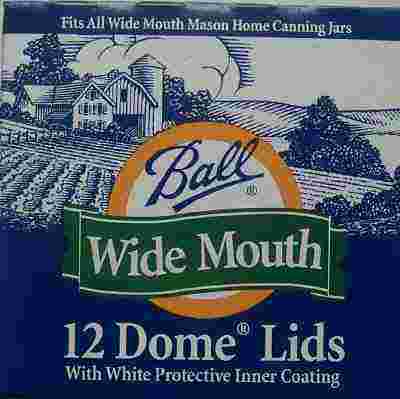
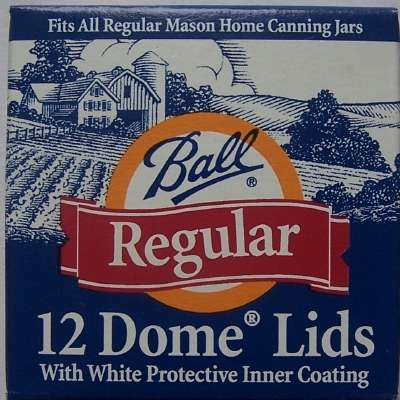
Looking for How to Make Pickled Cauliflower or Brussel Sprouts - Easily! With Step-by-step Directions, Photos, Ingredients, Recipe and Costs in 2026? Scroll down this page and follow the links. And if you bring home some fruit or vegetables and want to can, freeze, make jam, salsa or pickles, see this page for simple, reliable, illustrated canning, freezing or preserving directions. There are plenty of other related resources, click on the resources dropdown above. If you are having a hard time finding canning lids, I've used these, and they're a great price & ship in 2 days.
If you have questions or feedback, please let me know! There are affiliate links on this page. Read our disclosure policy to learn more.
How to Make Pickled Cauliflower or Brussel Sprouts - Easily! With Step-by-step Directions, Photos, Ingredients, Recipe and Costs
Yield: 8 to 10 pint jars
Click here for a PDF print version
Making and canning your own pickled Brussels sprouts or pickled cauliflower is pretty easy with the directions below!
But do note that the vinegar (pickling) is important. There are no recipes or directions for canning Brussels Sprouts from any of the canning authorities (USDA, Ball Blue Book, university food science departments, etc.). One, Michigan State University's extension, provided this explanation: Brussels sprouts are "Not recommended for canning because the processing intensifies strong flavors and discolors the vegetable. Brussels sprouts are much better frozen or pickled. "
If you'd rather freeze the cauliflower or Brussels Sprouts, see this page.
Ingredients
- 12 cups of 1- to 2-inch cauliflower flowerets or small Brussels sprouts
- 4 cups white vinegar (5 percent)
- 2 cups sugar
- 2 cups thinly sliced onions
- 1 cup diced sweet red peppers
- 2 tbsp mustard seed
- 1 tbsp celery seed
- 1 tsp turmeric
- 1 tsp hot red pepper flakes
Equipment
- 1 water bath canner (a huge pot with a lifting rack to sanitize the jars of applesauce after filling (about $30 to $35 at mall kitchen stores and local "big box" stores, but it's usually cheaper online from our affiliates) You CAN use a large pot instead, but the canners are deeper, and have a rack top make lifting the jars out easier. If you plan on canning every year, they're worth the investment.
- Jar grabber (to pick up the hot jars)
- Lid lifter (I like the lid rack that holds 12 lids or you can pull them out one at a time with the lid-lifter that has a magnet from the almost-boiling water where you sanitize them. ($4 at mall kitchen stores and local "big box" stores, but it's usually cheaper online from our affiliates)
- Jar funnel ($4 at mall kitchen stores and local "big box" stores, but it's usually cheaper online from our affiliates)
- At least 1 large pot (at least 8-quart size or larger)
- Large spoons and ladles,
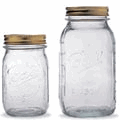
- Canning jars (often called Ball jars, Mason jars or Kerr jars) (Publix, Kroger, other grocery stores and some "big box" stores carry them - now about $12 per dozen quart jars (up 50% in 2 years!) including the lids and rings)
Directions - Step by Step
Step 1 - Wash the Brussels Sprouts or Cauliflower
Wash the cauliflower flowerets or brussel sprouts (removing stems and blemished outer leaves)
Step 2 - Get the jars and lids sanitizing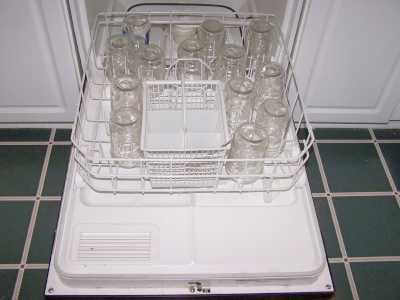
The dishwasher is fine for the jars; especially if it has a "sanitize" cycle.
I get that going while I'm preparing everything else, so it's done by the
time I'm ready to fill the jars. If you don't have a
dishwasher, submerge the jars in a large pot (the canner itself) of
water and bring it to a boil.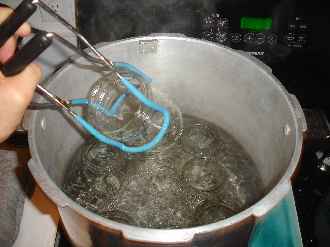
Be sure to let it go through the rinse cycle to get rid of any soap!
Get the canner heating up
Fill the canner about 1/2 full of water and start it heating (with the lid on).
Start the water for the lids
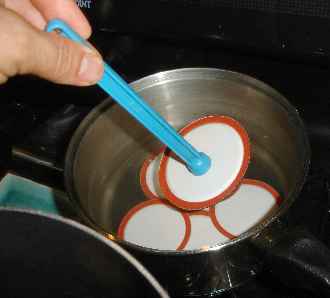 Put the lids into a pan of hot, but not quite boiling water for at least
several minutes. Note: everything gets
sanitized in the water
bath (step 7)
anyway, so this just helps to ensure
there is no spoilage later!)
Put the lids into a pan of hot, but not quite boiling water for at least
several minutes. Note: everything gets
sanitized in the water
bath (step 7)
anyway, so this just helps to ensure
there is no spoilage later!)
Need lids, rings and replacement jars?
Get them all here, delivered direct to your home, at the best prices on the internet!
Step 3 - Blanch (boil)
Boil the veggies in salt water (4 tsp canning salt per gallon of water) for 3 minutes for cauliflower and 4 minutes for brussel sprouts. This is called blanching; it stops the enzymes and kills bacteria, both of which can degrade flavor during storage.
Step 4 - Drain and cool.
Just drain them and cool them in ice water for about 10 minutes.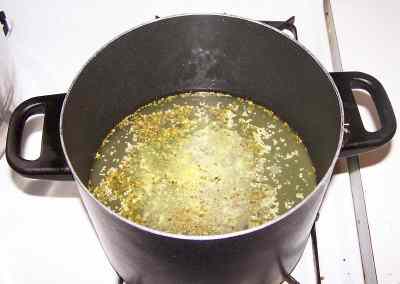
Step 5 - Mix the pickling solution
Combine the vinegar, sugar, onions, diced red pepper, and spices in large saucepan.
Step 6 - Heat the pickling solution
Bring the liquid to a boil and simmer for 5 minutes.
Step 7 - Fill the jars
Distribute the Brussels sprouts (or cauliflower) onion and diced pepper among jars. Fill jars with pieces and pickling solution, leaving 1/2-inch headspace.
Step 8 - Process (boil the jars in the water bath canner)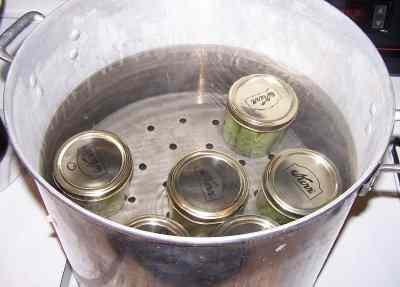
Put the jars in the canner and keep them covered with at least 1 inch of water. Keep the water boiling. Boil them for 10 minutes (or as directed by the table below if your altitude is greater than 1,000 ft).
Adjust lids and process according to the table below:
| Recommended process time for Pickled Cauliflower or Brussel Sprouts in a boiling-water canner. | |||
| Process Time at Altitudes of | |||
| Allowed Jar Sizes | 0 - 1,000 ft | 1,001 - 6,000 ft | Above 6,000 ft |
| Half-pints or Pints | 10 minutes | 15 minutes | 20 minutes |
Step 9 - Done
Lift the jars out of the water and let them cool without touching or bumping them in a draft-free place (usually takes overnight) You can then remove the rings if you like, but if you leave them on, at least loosen them quite a bit, so they don't rust in place due to trapped moisture. Once the jars are cool, you can check that they are sealed verifying that the lid has been sucked down. Just press in the center, gently, with your finger. If it pops up and down (often making a popping sound), it is not sealed. If you put the jar in the refrigerator right away, you can still use it. Some people replace the lid and reprocess the jar, then that's a bit iffy. If you heat the contents back up, re-jar them (with a new lid) and the full time in the canner, it's usually ok.
When can you start eating the pickles? Well, it takes some time
for the seasonings to be absorbed into the pickles. That's at
least 24 hours, but for best flavor wait 2 weeks! Ah... the wait...
This document was adapted from the "Complete Guide to Home Canning,"
Agriculture Information Bulletin No. 539, USDA, revised 2009.
Reviewed November 2009.
Tips
Comments and Feedback
Illustrated Canning, Freezing, Jam Instructions and Recipes
[ Easy Home Canning Directions] [FAQs - Answers to common questions and problems] [Recommended books about home canning, jam making, drying and preserving!] [Free canning publications to download and print]


Looking for canning equipment and supplies?
Water bath canner with a jar rack
Pressure canners for gas, electric and induction stoves: Presto 23Qt or T-fal 22Qt
 Canning scoop (this one is PERFECT)
 Ball Blue book (most recent version)
Jars: 8oz canning jars for jams

Want to start your own Podcast, Blog, Vlog, etc? This
GoPro kit has EVERYTHING you need:
all accessories
Find Other types of farms:
Farm markets and roadside stands
Road trips and camping resources
Local Honey, apiaries, beekeepers
Consumer fraud and scams information
Home canning supplies at the best prices on the internet!
Maple Syrup Farms, sugarworks, maple syrup festivals
Environmental information and resources
Farms For Your Event for birthday parties, weddings, receptions, business meetings, retreats, etc.
Festivals - local fruit and vegetable festivals
Get the
most recent version of
the Ball Blue Book
Canning and preserving, making jams, salsa, sauces, pickles, etc is SO easy with our step by step directions! Just about all you need is a canner and canning jars!
