
Looking for Lemon Curd (directions, recipe, with photos and free) in 2026? Scroll down this page and follow the links. And if you bring home some fruit or vegetables and want to can, freeze, make jam, salsa or pickles, see this page for simple, reliable, illustrated canning, freezing or preserving directions. There are plenty of other related resources, click on the resources dropdown above. If you are having a hard time finding canning lids, I've used these, and they're a great price & ship in 2 days.
If you have questions or feedback, please let me know! There are affiliate links on this page. Read our disclosure policy to learn more.
Lemon Curd (directions, recipe, with photos and free)
How to Make Homemade/ Home-canned Lemon Curd or Lime
Curd
Making and canning (or freezing) your own Lemon Curd or Lime Curd is
easy. Here's how to make your own home canned citrus juice,
complete instructions in easy steps and completely illustrated. The
Lemon Curdc will taste MUCH better than anything you've ever had
from a store, and by selecting the right lemons, it will be so
naturally-sweet that you won't need to add any sugar at all.
Prepared this way, the jars have a shelf life of 18 months to 2 years, and require no special attention.
Prepared lemon curd can also be frozen instead of canned for up to 1 year without quality changes when thawed. Package in freezer containers after straining and cooling to room temperature. To thaw, place container in a refrigerator at 40°F or lower for 24 hours before intended use. After thawing, consume within 4 weeks. (See Freezer Lemon Curd, http://www.uga.edu/nchfp/publications/nchfp/factsheets/freezer_lemoncurd.pdf)
Directions for Making Lemon Curd or Lime Curd
Yield: About 3 to 4 half-pint jars
Ingredients
- 2-1/2 cups superfine sugar (it can be hard to find in the stores, and is not the same as powdered sugar, so here's how to make your own: just put regular granulated sugar through a grinder or food processor for 1 minute, let settle, and use in place of superfine sugar. Do not use powdered sugar.)
- 1/2 cup lemon zest (freshly zested), optional
- 1 cup lemon juice (The food scientists say bottled lemon or Lime juice considered to be safer than fresh due to a more consistent pH, but obviously that defeats the purpose f you have access to fresh lemons or Limes. The point is the opposite: if you cannot get fresh lemons, bottled lemon juice is fine!)
- 3/4 cup unsalted butter, chilled, cut into approximately 3/4" pieces
- 7 large egg yolks
- 4 large whole eggs
Equipment
- lemon zester,
- balloon whisk,
- 1 and 1/2 quart double boiler (the top double boiler pan should be at least 1.5 quart volume), If you do not have a double boiler, just use a large bowl or saucepan that can fit partway down into a saucepan of a smaller diameter. OR If the bottom pan has a larger diameter, the top bowl or pan should have a handle(s) that can rest on the rim of the lower pan.
- strainer,
- kitchen thermometer measuring at least up to 180°F,
- glass or stainless steel medium mixing bowl,
- silicone spatula or cooking spoon,
- Jar grabber (to pick up the hot jars)
- Lid lifter (I like the lid rack that holds 12 lids or you can pull them out one at a time with the lid-lifter that has a magnet from the almost-boiling water where you sanitize them. ($4 at mall kitchen stores and local "big box" stores, but it's usually cheaper online from our affiliates)t)
- Jar funnel ($4 at mall kitchen stores and local "big box" stores, but it's usually cheaper online from our affiliates)t)
- At least 1 large pot (at least 8-quart size or larger)
- Large spoons and ladles,
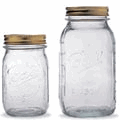
- Canning jars (often called Ball jars, Mason jars or Kerr jars) (Publix, Kroger, other grocery stores and some "big box" stores carry them - now about $12 per dozen quart jars (up 50% in 2 years!) including the lids and rings)
- Sieve:
- a simple metal or plastic sieve.
- colander
- Filters - if you want filtered juice
- jelly bag
- cheesecloth
- coffee filters
- 1 water bath canner (a huge pot with a lifting rack to sanitize the jars of lemon juice after filling (about $30 to $35 at mall kitchen stores and local "big box" stores, but it's usually cheaper online from our affiliates) You CAN use a large pot instead, but the canners are deeper, and have a rack top make lifting the jars out easier. If you plan on canning every year, they're worth the investment.
Recipe and Directions
Step 1 - Selecting the lemons
The most important step! You should choose the best lemons
you can get and make far better Lemon Curd. Don't get me wrong, it
is fine to use small lemons and less attractive varieties, as long as they
are firm and unspoiled! As noted in the ingredients section, you can use
bottled or even frozen juice instead.
Step 2 - How many lemons and where to get them
You can pick your own, or buy them at the grocery store. But for large quantities, you will find that real* farmer's markets, like the Farmer's Market in Forest Park, Georgia have them at the best prices. In 2004, they were available from late September at $11 to $16 per bushel. 2005 prices have been in the $14 to $20 range at the real farmer's markets, like the Atlanta-Forest park Georgia State Farmer's Market and orchards in the southeast of the U.S.
You will get about 12 to 20 quarts of lemon juice per bushel of lemons. Count on 15 or 16 quarts per bushel.
* - not the cutesy, fake farmer's markets that are just warehouse grocery stores that call themselves farmer's markets.
 Step
3 - Wash the jars and lids
Step
3 - Wash the jars and lids
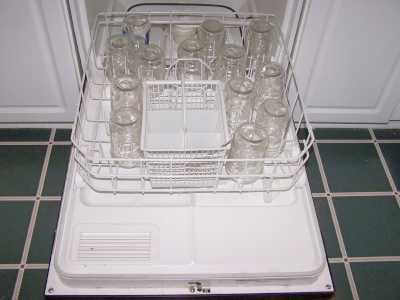
Now's a good time to get the jars ready, so you won't be rushed later. The dishwasher is fine for the jars; especially if it has a "sanitize" cycle, the water bath processing will sanitize them as well as the contents! If you don't have a dishwasher with a sanitize cycle, you can wash the containers in hot, soapy water and rinse, then sanitize the jars by boiling them 10 minutes, and keep the jars in hot water until they are used. Leave the jars in the dishwasher on "heated dry" until you are ready to use them. Keeping them hot will prevent the jars from breaking when you fill them with the hot Lemon Curd.
Put the lids into a pan of hot, but not quite boiling water (that's what the manufacturer's recommend) for 10 minutes, and use the magnetic "lid lifter wand" to pull them out.
Step 4 -Wash and peel the lemons or Limes!
I'm sure you can figure out how to wash the fruit in plain cold water. If you have a juicer or squeezer, it obviously makes it much easier. If you don't have a juicer, don't fret, just peel the fruit (as shown in the photo), then chop or crush the fruit with a potato masher and continue to the next step.
See here for related tools, equipment, supplies on Amazon See here for related tools, equipment, supplies on Amazon See here for related tools, equipment, supplies on Amazon
Step 5 - Briefly, quickly cook the lemons / Limes
Pretty simple put about 2 inches of water (I used filtered tap water)
on the bottom of a huge, thick-bottomed pot. Put the lid on, and the heat on high. When it gets really going, turn it off - you only want to
release the juice from the pulp.. Obviously, if you used a juicer, you can
skip this step and step 6.
on high. When it gets really going, turn it off - you only want to
release the juice from the pulp.. Obviously, if you used a juicer, you can
skip this step and step 6.
Hardware stores sell a fruit steamer. I haven't used one yet, but I hear they work well.
Step 6 - Sieve the cooked lemons
Now you want to separate the liquid from the pulp, skins, seeds, stems, etc. There are quite a variety of ways to filter the lemons.
Unfiltered juice:
- I like a natural lemon curd, with the natural cloudiness of the fruit particles in it, so I just plop the cooked lemons into a large metal or plastic sieve or colander.
- You can also refrigerate the juice for 24 to 48 hours and then decant it (without mixing, carefully pour off clear liquid and discard sediment).
Filtered juice:
- A better way if you want filtered lemon juice is just to line your sieve or colander with several layers of cheese cloth and let the juice drip through. It could take an hour..
- If you want really clear Lemon Curd (but most people prefer "natural" style with some solids) you can strain the juice through a paper coffee filter place inside a sieve or colander.
- If you want more filtered Lemon Curd, use a jelly bag. Just pour hot prepared fruit pulp into a jelly bag and let it drip. . Do not squeeze the bag.! In my experience this method takes forever.
Note: One of the easiest ways to extract juice is by using a steam juicer available at many hardware and variety stores. If you plan on making a lot of juice or doing this every year, it may be worth buying one. This unique piece of equipment allows you to conveniently extract juice by steaming the fruit which is held in a retaining basket. The juice drops into a reservoir which has a tube outlet for removal. Follow manufacturer's instructions for using steam juicer.
Step 7 - Prepare the other ingredients
Combine the sugar and lemon zest in a small bowl, stir to mix, and set aside about 30 minutes. Pre-measure the lemon juice and prepare the chilled butter pieces.
Step 8 - Get the double boiler read
Heat water in the bottom pan of the double boiler until it boils gently. The water should not boil vigorously or touch the bottom of the top double boiler pan or bowl in which the curd is to be cooked. Steam produced will be sufficient for the cooking process to occur.
Step 9 - Whisk Eggs and then combine
In the top of the double boiler, on the counter top or table, whisk the egg yolks and whole eggs together until thoroughly mixed. Slowly whisk in the sugar and zest, blending until well mixed and smooth. Blend in the lemon juice and then add the butter pieces to the mixture.
Step 10 - Carefully heat over the double boiler to 170 F
Place the top of the double boiler over boiling water in the bottom pan. Stir gently but continuously with a silicone spatula or cooking spoon, to prevent the mixture from sticking to the bottom of the pan. Continue cooking until the mixture reaches a temperature of 170°F. Use a food thermometer to monitor the temperature.
Step 11 - Remove from heat and stir until thickened
Remove the double boiler pan from the stove and place on a protected surface, such as a dish cloth or towel on the counter top. Continue to stir gently until the curd thickens (about 5 minutes). Strain curd through a mesh strainer into a glass or stainless steel bowl; discard collected zest.
 Step
12 - Fill the jars and process them in the water bath
Step
12 - Fill the jars and process them in the water bath
Fill boiling water canner with enough water to cover the filled jars by
1 to 2 inches. Use a thermometer to preheat the water to 180°F by the time
filled jars are ready to be added. This is different from other
canning recipes because you are not to heat the water in the canner to
more than 180°F before jars are added. If the water in the canner is too
hot when jars are added, the process time will not be long enough. The
time it takes for the canner to reach boiling after the jars are added is
expected to be 25 to 30 minutes for this product. Process time starts
after the water in the canner comes to a full boil over the tops of the
jars.
Fill them to within 1/2-inch of the top, wipe any spilled Lemon Curd of the top, seat the lid and tighten the ring around them. Put them in the canner and keep them cover with at least 1 or 2 inches of water and boiling. if you are at sea level (up to 1,000 ft) boil pint or quart jars for 5 minutes and half gallon jars for 10 min. This assumes you kept the juice hit until you filled the jars. If you are at an altitude of 1,000 feet or more, see the chart below
| Recommended process time for Canned Lemon Curd in a boiling-water canner. | ||||
| Process Time at Altitudes of | ||||
| Style of Pack | Jar Size | 0 - 1,000 ft | 1,001 - 6,000 ft | Above 6,000 ft |
| Hot | Half-pints | 15 min | 20 | 25 |
Step 13 - Remove and cool the jars - Done
Lift the jars out of the water and let them cool without touching or bumping them in a draft-free place (usually takes overnight) You can then remove the rings if you like, but if you leave them on, at least loosen them quite a bit, so they don't rust in place due to trapped moisture. Once the jars are cool, you can check that they are sealed verifying that the lid has been sucked down. Just press in the center, gently, with your finger. If it pops up and down (often making a popping sound), it is not sealed. If you put the jar in the refrigerator right away, you can still use it. Some people replace the lid and reprocess the jar, then that's a bit iffy. If you heat the contents back up, re-jar them (with a new lid) and the full time in the canner, it's usually ok.
Storage
Shelf Life: For best quality, store in a cool, dark place (away from light). Plan to use canned lemon curd within 3 to 4 months. Browning and/or separation may occur with longer storage; discard any time these changes are observed.
Other Equipment:
From left to right: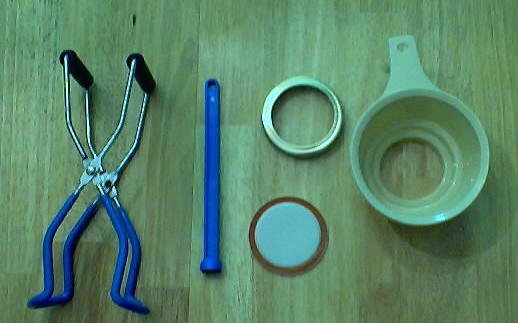
- Jar lifting tongs to pick up hot jars
- Lid lifter - to remove lids from the pot of boiling water (sterilizing )
- Lids- disposable - you may only use them once
- Ring - holds the lids on the jar until after the jars cool - then you remove them, save them and reuse them
- Canning Jar funnel - to fill the jars
 Granite Ware 21 QT, 9 Piece Enamelware Water bath Canning Pot with Canning kit, Colander and Rack VKP Brands Water Bath AND Steam Canner, 20 Quart Stainless Steel, flat-bottomed Induction range compatible and safe for smooth top ranges. 
|
Home Canning KitsSee the seller's website for more information, features, pricing and user reviews! This is the same type of standard canner that my grandmother used
to make everything from lemon juice to jams and jellies to tomato and
spaghetti sauce. This complete kit includes everything you need: the
canner, jar rack, Jar grabber tongs, lid lifting wand, a plastic funnel,
labels, bubble freer, and the bible of canning, the Ball Blue Book. You will never need anything else except more jars and lids! |
| See here for related tools, equipment, supplies on Amazon |
Norpro 1951 Manual Food Strainer, with optional motor; (almost identical to Victorio V250, Villaware and Roma models, all discontinued)
See the seller's website for more information, features, pricing and user reviews! |
| See here for related tools, equipment, supplies on Amazon |
Deluxe Food Strainer and Sauce MakerA food strainer allows you to easily make smooth tomato sauces, seedless jams and jellies, applesauce, soups, baby foods, and much more. The strainers can use different sized screens to filter out different sized seeds and debris. There are both hand cranked and motorized versions.
|
|
|
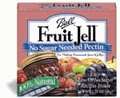
Lids, Rings, Jars, mixes, pectin, etc.Need lids, rings and replacement jars? Or pectin to make jam, spaghetti sauce or salsa mix or pickle mixes? Get them all here, and usually at lower prices than your local store! |


Looking for canning equipment and supplies?
Water bath canner with a jar rack
Pressure canners for gas, electric and induction stoves: Presto 23Qt or T-fal 22Qt
 Canning scoop (this one is PERFECT)
 Ball Blue book (most recent version)
Jars: 8oz canning jars for jams

Want to start your own Podcast, Blog, Vlog, etc? This
GoPro kit has EVERYTHING you need:
all accessories
Find Other types of farms:
Farm markets and roadside stands
Road trips and camping resources
Local Honey, apiaries, beekeepers
Consumer fraud and scams information
Home canning supplies at the best prices on the internet!
Maple Syrup Farms, sugarworks, maple syrup festivals
Environmental information and resources
Farms For Your Event for birthday parties, weddings, receptions, business meetings, retreats, etc.
Festivals - local fruit and vegetable festivals
Get the
most recent version of
the Ball Blue Book
Canning and preserving, making jams, salsa, sauces, pickles, etc is SO easy with our step by step directions! Just about all you need is a canner and canning jars!
