
Looking for How to Make Peach Syrup - Easily!(Also syrup from nectarines, plums, pluots or apricots) in 2026? Scroll down this page and follow the links. And if you bring home some fruit or vegetables and want to can, freeze, make jam, salsa or pickles, see this page for simple, reliable, illustrated canning, freezing or preserving directions. There are plenty of other related resources, click on the resources dropdown above. If you are having a hard time finding canning lids, I've used these, and they're a great price & ship in 2 days.
If you have questions or feedback, please let me know! There are affiliate links on this page. Read our disclosure policy to learn more.
How to Make Peach Syrup - Easily!(Also syrup from nectarines, plums, pluots or apricots)
How to Make Homemade Peach Syrup - Easily!
(NOTE: This recipe works equally well with other types of stone fruit, like nectarines, apricots, plums, pluots, etc.)
Click here for a PDF print version!
 Making
and canning your own peach syrup is so easy. Juices from fresh or
frozen peaches are easily made into toppings for use on ice cream and
pastries. Here's how to do it, in simple steps and completely
illustrated.
Making
and canning your own peach syrup is so easy. Juices from fresh or
frozen peaches are easily made into toppings for use on ice cream and
pastries. Here's how to do it, in simple steps and completely
illustrated.
For more information about peaches, see Peach Picking Tips
For blueberry jam, click here, and for easy applesauce or apple butter directions, click on these links. And here are simple directions to make blueberry deserts: cobbler, coffee cakes / buckles and pie!
Ingredients
- peaches
- 7 cups of fresh prepared or frozen peaches or nectarines to produce about 8 cups of juice. That generally means about 14 tennis ball sized peaches. - Lemon juice - either fresh squeezed or bottled. 1/4 cup per batch - completely optional; I add the lemon juice because the natural citric acid helps to maintain the color and the natural acid helps to improve safety and shelf life; while it is such a small amount, I can't taste it in the finished syrup. .
- Sugar - 4 cups of dry, granulated (table) sugar. It is possible to make low-sugar, fruit juice-sweetened, or Stevia (in a prepared form like Truvia, it measures same as sugar; if you use another form, you will need do your own conversion) - or Splenda, if you prefer, -sweetened syrup; I'll point out the differences below.
Equipment
- At least 1 large pot; I prefer 16 to 20 quart Nonstick ceramic coated pots for easy cleanup.
- Large spoons and ladles,
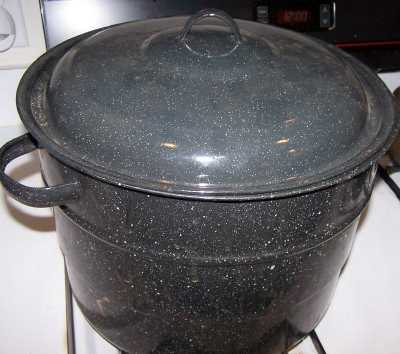
- 1 Water Bath Canner (a huge pot to sanitize the jars after filling (about $30 to $35 at mall kitchen stores, sometimes at big box stores and grocery stores.). Note: we sell canners and supplies here, too - at excellent prices - and it helps support this web site!
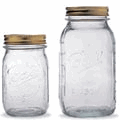
- Half pint canning jars (Grocery stores, like Publix, Kroger, Safeway carry them, as do some big box stores - about $7 per dozen 8 ounce jars including the lids and rings)
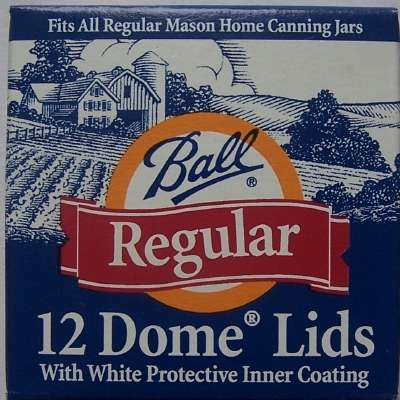
- Lids - thin, flat, round metal lids with a gum binder that seals them against the top of the jar. They may only be used once.
- Rings - metal bands that secure the lids to the jars. They may be reused many times.
- Jar funnel ($5 at Target, other big box stores, and often grocery stores; and available online - see this page) or order it as part of the kit with the Jar grabber .
- Jar grabber (to pick up the hot jars)- Big box stores and grocery stores sometimes carry them; and it is available online - see this page. It's a tremendously useful to put jars in the canner and take the hot jars out (without scalding yourself!). The kit sold below has everything you need, and at a pretty good price
Optional stuff:
|
Peach Syrup-making Directions
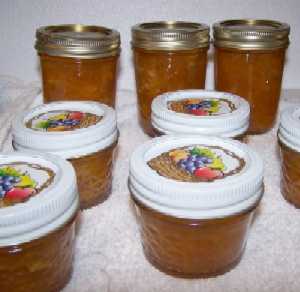
This example shows you how to make peach (or any berry) syrup! The yield from this recipe is about 9 or 10 eight-ounce jars (which is the same as 5 pints).
Step 1 - Pick the peaches! (or buy them already picked)
It's fun to go pick your own and you can obviously get better quality ones!
I prefer to grow my own; which is really easy - but that does take some space and time.
As mentioned in the Ingredients section; you may use frozen peaches
(those without syrup or added sugar); which is especially useful if you want
to make some syrup in December to give away at Christmas!
At left are
peaches
(in my yard, actually; they make a great hedge or landscaping
bush) almost ripe! If you want to pick your own, here is a list and links to
the pick your own farms.
Step 2 - How much fruit?
Syrup can be made in any size batch, but the 6 1/2 cups of fresh or frozen peaches (or other stone fruit) at a time is normal and manageable - it is difficult to get even heating on larger batches) You can scale the recipe down, if desired, to make any smaller amount.
Step 3 - Wash the jars and lids
Now's a good time to get the jars ready, so you won't be rushed later. The dishwasher is fine for the jars; especially if it has a "sanitize" cycle, the water bath processing will sanitize them as well as the contents! If you don't have a dishwasher with a sanitize cycle, you can wash the containers in hot, soapy water and rinse, then sanitize the jars by boiling them 10 minutes, and keep the jars in hot water until they are used.
Canning jars in the dishwasher NOTE: If a canning recipe calls for 10 minutes or more of process time in the canner, then the jars do not need to be "sanitized" before filling them. But really, sanitizing them first is just good hygeine and common sense! See this page for more detail about cleaning and sanitizing jars and lids.
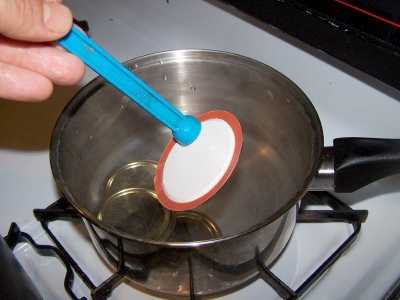
Put the lids into a pan of hot, but not quite boiling water (that's what the manufacturer's recommend) for 10 minutes, and use the magnetic "lid lifter wand" to pull them out.
Leave the jars in the dishwasher on "heated dry" until you are ready to use them. Keeping them hot will prevent the jars from breaking when you fill them with the hot syrup.

Need lids, rings and replacement jars?
Get them all here, delivered:
Lids: put the very hot (but not quite boiling; around 180 F, steaming water is fine)
water for at least several
minutes; to soften up the gummed surface and clean the lids. I just
leave them in there, with the heat on very low, until I need them!
Step 4 -Wash the fruit and sort!
 I'm
sure you can figure out how to wash the fruit in a colander of plain cold
water.
I'm
sure you can figure out how to wash the fruit in a colander of plain cold
water.
Then you need to pick out and remove any bits of stems, leaves and soft or mushy fruit. It is easiest to do this in a large bowl of water and gently run your hands through the fruit as they float. With your fingers slightly apart, you will easily feel any soft or mushy fruit get caught in your fingers.
Then just drain off the water!
Step 5 - Peeling the Peaches
Peaches and nectarines should be peeled, that's where any pesticides or fungicides reside, and they don't taste very good.
For those you want to peel, here's a great trick that works with many
fruits and vegetables with skins (like tomatoes): just dip the fruit in
boiling water for 30 to 60 seconds.

Remove from the water using a slotted spoon and put into a large bowl or pot of cold water and ice.

The skins will easily slide off now IF the peaches are ripe! The more
unripe they are, the longer you will need to heat them. You can now eat
the peaches, or
 can
them or make peach jam,
etc.
can
them or make peach jam,
etc.
For this recipe, we only need the peelings. Save all washed, sound pieces and peelings from the peaches. (if you are peeling the peaches in advance, keep the peelings refrigerated until ready to use).
I mentioned in the ingredients section that you can use canned peach juice. That's true, but it is much more difficult. The peelings add a lot of solid particulates which help the "honey" to thicken.
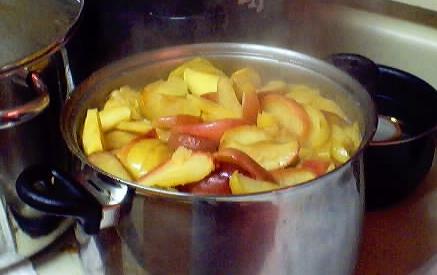
Step 6 -Chop the peaches, nectarines, plums, pluots or apricots!
I'm sure you can figure out how to wash the peaches, nectarines, plums, pluots or apricots in plain cold water.
Chopping them is usually pretty easy, just run a sharp knife around them, down to the pit or stone, and pull the halves apart. Unless they are very hard and unripe, you should need to cut them up further.
 Step
7 - Cook the Peaches, Nectarines, Plums, Pluots or Apricots
Step
7 - Cook the Peaches, Nectarines, Plums, Pluots or Apricots
Pretty simple put about 4 inches of water (I used filtered tap water) on the bottom of a huge, thick-bottomed pot. Put the lid on, and the heat on high. When it gets really going, turn it to medium high until the peaches, nectarines, plums, pluots or apricots are soft through and through. It will only take 10 minutes or so.
Hardware stores sell a fruit steamer. I haven't used one yet, but I hear they work well.
NOTE: If you have a electric juicer, you can simply juice the chopped peaches, nectarines, plums, pluots or apricots, then skip to step 7 to heat the juice to boiling.
Note: One of the easiest ways to extract juice is by using a steam juicer available at many hardware and variety stores. If you plan on making a lot of juice or doing this every year, it may be worth buying one. This unique piece of equipment allows you to conveniently extract juice by steaming the fruit which is held in a retaining basket. The juice drops into a reservoir which has a tube outlet for removal. Follow manufacturer's instructions for using steam juicer. See the steam juicers at the right side of this page. All of them get very positive reviews (4 out of 5 stars) from owners online)
Step 8 - Sieve the cooked peaches, nectarines, plums, pluots or apricots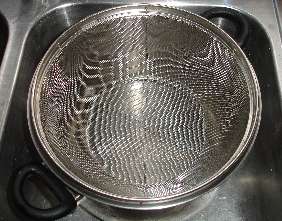

Now you want to separate the liquid from the pulp, skins, seeds, stems, etc. There are quite a variety of ways to filter the peaches, nectarines, plums, pluots or apricots.
Unfiltered syrup:
- I like a natural fruit syrup, with the natural cloudiness of the fruit particles in it, so I just plop the cooked peaches, nectarines, plums, pluots or apricots into a large metal or plastic sieve or colander. I use a sieve that fits just inside a large pot, or for more pulp bits, use a Foley Food Mill) and let them drain until they are cool enough to handle. That will remove any large chunks of skins, stems, etc, and will leave a syrup that has a natural look and high in pulp. A Foley food mill works very well.
- You can also refrigerate the juice for 24 to 48 hours and then Decant it (without mixing, carefully pour off clear liquid and discard sediment).
Filtered syrup:
- If you want filtered syrup, just to line your sieve or colander with several layers of cheese cloth and let the juice drip through. It could take an hour.. Discard the dry pulp. The yield of the pressed juice should be about 4 1/2 to 5 cups. You tend to get a better yield when you use a juicer; they are more efficient.
- If you want really clear fruit syrup (but most people prefer "natural" style with some solids) you can strain the juice through a paper coffee filter place inside a sieve or colander.
- If you want more filtered fruit syrup, use a jelly bag. Just pour hot prepared fruit pulp into a jelly bag and let it drip. . Do not squeeze the bag.! In my experience this method takes forever.
Step 9 - Measure out the sweetener
You can make syrup with sugar, fruit juice or artificial sweetener, depending upon your needs. The sweetener is not needed fpr safety, only for your own preference in taste. You can skip it or use agave or honey to taste.
| Type of syrup | Sweetener |
| regular | 3 cups of sugar |
| low sugar | 2 cups of sugar |
| lower sugar | 1 cup sugar and 1 cup of Stevia (Truvia) or Splenda |
| no sugar | 2 cups Truvua/Stevia or Splenda |
| honey | 1 cup (or to your own taste) |
| agave | 1 cup (or to your own taste) |
| natural | nothing added) |
Step 10 - Mix the peach juice with the sweetener and lemon juice and cook to a
boil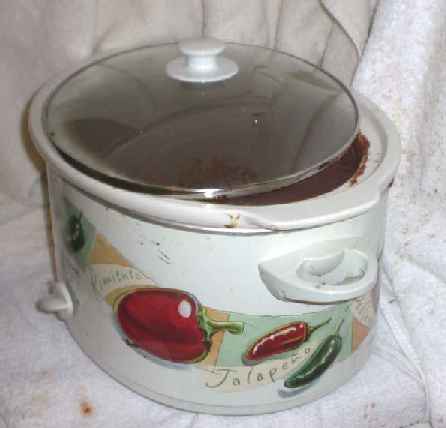

Add the 1/4 cup lemon juice and sweetener (if any) to the hot juice and bring to a simmering boil. The goal is to reheat the juice and boil down the juice to thicken it to a syrupy consistency. If you like a thinner syrup, you can just heat the juice (the sugar will thicken it some).
If you want a thicker syrup, a crockpot works very well for this! You can let it go on low overnight with the lid off and keep it hot until you get enough made to fill the jars you will put into the canner.
Step 11 - Fill the jars and put the lid and rings on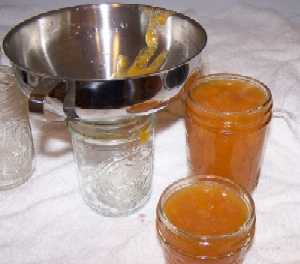
Fill them to within 1/4 to 1/2 inch of the top, wipe any spilled syrup off the top, seat the lid and tighten the ring around them. Then put the filled jars into the canner!
This is where the jar tongs and lid lifter come in really handy!
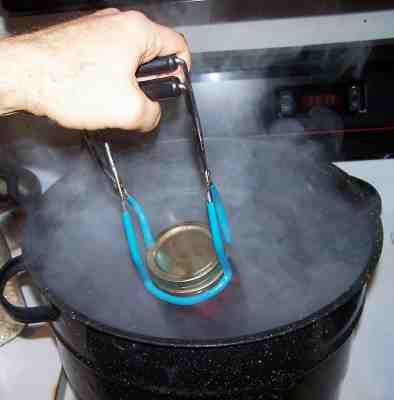
Step 12 - Process the jars in the boiling water bath
 Keep
the jars covered with at least 2 inches of water. Keep the water
boiling. In general, boil them for 10 to 15 minutes. I say "in
general" because it depends upon the jar size and altitude. You have to
process (boil) them longer at higher altitudes than sea level, or if you
use larger jars, or if you did not sanitize the jars and lids right
before using them. See the table below:
Keep
the jars covered with at least 2 inches of water. Keep the water
boiling. In general, boil them for 10 to 15 minutes. I say "in
general" because it depends upon the jar size and altitude. You have to
process (boil) them longer at higher altitudes than sea level, or if you
use larger jars, or if you did not sanitize the jars and lids right
before using them. See the table below:
| Recommended Process Times in a Boiling-Water Canner for Hot Pack Fruit Syrups | |||
|
Process times (in minutes) for altitudes of |
|||
| Jar size | 0-1,000 ft. | 1,001 -6,000 ft. | Over 6,000 ft |
| Half-pints | 10 min | 15 min | 20 min |
| Pints | 10 min | 15 min | 20 min |
Step 13 - Remove and cool the jars - Done!
 Lift
the jars out of the water and let them cool without touching or bumping
them in a draft-free place (usually takes overnight) You can then remove
the rings if you like, but if you leave them on, at least loosen them
quite a bit, so they don't rust in place due to trapped moisture. Once
the jars are cool, you can check that they are sealed verifying that the
lid has been sucked down. Just press in the center, gently, with your
finger. If it pops up and down (often making a popping sound), it is not
sealed. If you put the jar in the refrigerator right away, you can still
use it. Some people replace the lid and reprocess the jar, then that's a
bit iffy. If you heat the contents back up, re-jar them (with a new lid)
and the full time in the canner, it's usually ok.
Lift
the jars out of the water and let them cool without touching or bumping
them in a draft-free place (usually takes overnight) You can then remove
the rings if you like, but if you leave them on, at least loosen them
quite a bit, so they don't rust in place due to trapped moisture. Once
the jars are cool, you can check that they are sealed verifying that the
lid has been sucked down. Just press in the center, gently, with your
finger. If it pops up and down (often making a popping sound), it is not
sealed. If you put the jar in the refrigerator right away, you can still
use it. Some people replace the lid and reprocess the jar, then that's a
bit iffy. If you heat the contents back up, re-jar them (with a new lid)
and the full time in the canner, it's usually ok.
Once cooled, they're ready to store. I find they last up to 12 months. But after about 6 to 8 months, they get darker in color and start to get runny. They still are safe to eat, but the flavor and texture aren't as good. So eat them in the first 6 months after you prepare them!
Other Equipment:From left to right:
|
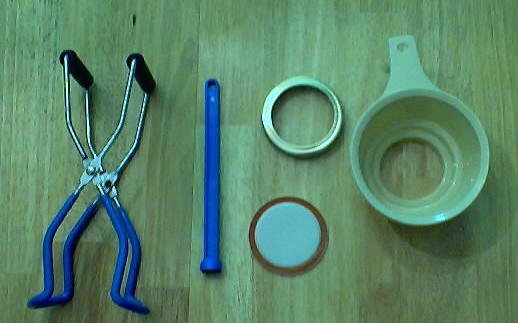 You can get all of the tools in a kit here: See here for related tools, equipment, supplies on Amazon |
|
Granite Ware 21 QT, 9 Piece Enamelware Water bath Canning Pot with Canning kit, Colander and Rack VKP Brands Water Bath AND Steam Canner, 20 Quart Stainless Steel, flat-bottomed Induction range compatible and safe for smooth top ranges. 
|
Home Canning KitsSee the seller's website for more information, features, pricing and user reviews! This is the same type of standard canner that my grandmother used to make everything from applesauce to syrups and jellies to tomato and spaghetti sauce. This complete kit includes everything you need and lasts for years: the canner, jar rack, Jar grabber tongs, lid lifting wand, a plastic funnel, labels, bubble freer, and the bible of canning, the Ball Blue Book. It's much cheaper than buying the items separately. You will never need anything else except jars and lids (and the jars are reusable). To see more canners, of different styles, makes and prices, click here!
|
Canning booksCanning and
Preserving for Dummies Get Canning and Preserving For Dummies |
|
The All New Ball Book Of Canning And Preserving: Over 350 of the Best Canned, Jammed, Pickled, and Preserved Recipes PaperbackThis is THE book on canning! My grandmother used this book when I was a child. It tells you in simple instructions how to can almost anything; complete with recipes for syrup, jellies, pickles, sauces, canning vegetables, meats, etc. If it can be canned, this book likely tells you how! Click on the link below for more information and / or to buy (no obligation to buy)
Click here for more information about the Ball Blue Book of Preserving
|
Summary - Cost of Making Homemade Peach Syrup - makes 10 jars, 8 oz each** |
||||
| Item | Quantity | Cost in 2026 | Source | Subtotal |
| peaches |
1 gallon | $10.00/gallon | Pick your own | $10.00 |
| Canning jars (8 oz size), includes lids and rings | 10 jars | $11/dozen 8 oz jars or $0.92/jar12.00 or $0.92/jar |
Grocery stores, like Public, Kroger, Safeway and sometimes, Big Lots, local hardware stores and big box stores | $5.60 |
| Sugar | 5 cups | $2.50 | Grocery stores, like Public, Kroger, Safeway and sometimes, Big Lots, local hardware stores and big box stores | $2.50 |
| Total | $18.10 total or about $1.81 per 8 oz jar |
|||
|
* - This assumes you already have the pots, pans, ladles,, and reusable equipment. Note that you can reuse the jars, and that reduces the cost! Just buy new lids (the rings are reusable, but the flat lids are not)! |
||||
Can't find the equipment? We ship to all 50 states!
Use our Feedback form!
Answers to Common Questions
Looking for canning equipment and supplies?Water bath canner with a jar rack Pressure canners for gas, electric and induction stoves: Presto 23Qt or T-fal 22Qt
Jars: 8oz canning jars for jams Want to start your own Podcast, Blog, Vlog, etc? This
GoPro kit has EVERYTHING you need:
all accessories Find Other types of farms:Farm markets and roadside stands Road trips and camping resources Local Honey, apiaries, beekeepers Consumer fraud and scams information Home canning supplies at the best prices on the internet! Maple Syrup Farms, sugarworks, maple syrup festivals Environmental information and resources Farms For Your Event for birthday parties, weddings, receptions, business meetings, retreats, etc. Festivals - local fruit and vegetable festivals
Canning and preserving, making jams, salsa, sauces, pickles, etc is SO easy with our step by step directions! Just about all you need is a canner and canning jars! |


 Canning scoop (this one is PERFECT)
 Ball Blue book (most recent version)

