
How to Make Fig Preserves (Fig Jam) - Easily! With Step-by-step Photos, Recipe, Directions, Ingredients and Costs
This month's notes: July 2026: Stored US apples are still available. See your state's crop availability calendar for more specific dates of upcoming crops.
Valentine's Day - February 14 - See this website for Valentines Day history, facts and top picks for fast, easy, inexpensive gifts for the man, woman or children in your life!
Easter will be April 16, 2017 - if you want to take your children to a free Easter egg hunt - see our companion website to find a local Easter Egg hunt!
And we have home canning, preserving, drying and freezing directions. You can access recipes and other resources from the drop down menus at the top of the page or the site search. If you have any questions or suggestions, feel free to write me! Also make your own ice cream; see How to make ice cream and ice cream making equipment and manuals. Have fun, eat healthier and better tasting, and save money by picking your own locally grown fruit and vegetables, and then using our easy directions
 Subscribe
to our: Email
alerts; Follow us on Twitter
Add
this page to your favorites! -
Email this page to a friend, or to yourself
Subscribe
to our: Email
alerts; Follow us on Twitter
Add
this page to your favorites! -
Email this page to a friend, or to yourself
How to Make Homemade Fig Jam - Easily!
If you are looking for a traditional, simple natural fig jam recipe, this is it, and it is quite easy. And if you have never tasted homemade fig jam, it is amazing. If you like strawberry jam, you will love fig jam. Here's how to make it, in easy steps and completely illustrated. This recipe has been around for generations, it is just the way your great grandmother would have made fig jam. The caveat is; since the old-fashioned jam recipes do not use any added pectin, and rely only on the pectin already in the figs, the recipe calls for a LOT of sugar. People always ask, can I make this fig jam and reduce or skip the sugar altogether? Sure, if you want to drink your jam; it will be very runny. The way to cut down on added sugar is to use pectin (which occurs naturally in fruit anyway!!!) For the fig jam recipe using pectin, click here. For the old fashioned fig jam recipe, just scroll down the page!For more information about figs, see Fig Picking Tips. See this page for directions about how to can figs. See this page for how to make fig-strawberry jam. See this page for Blueberry Jam directions, and for strawberry, blackberry, raspberry, peach, etc., and other types of jam, see this jam-making page!
For easy applesauce or apple butter directions, click on these links.
Ingredients
- Figs - fresh figs - 5 or 6 lbs of ripe figs like Brown
Turkey (that's about 25 large figs, or 50 smaller ones, like Celeste).
It also depends on the density of the figs, which varies
quite a bit based on weather, variety and degree of ripeness. This makes 7
jars (8 ounces each) of jam.

- Lemon juice - 1/4 cup of fresh squeezed or bottled lemon juice. the canning scientists say bottled is better because its pH is consistent.
- Water - 3/4 cup
- Sugar - 6 cups of dry, granulated (table) sugar
Equipment
- 1 large pot; I prefer 16 to 20 quart Nonstick ceramic coated pots for easy cleanup.
- Large spoons and ladles,
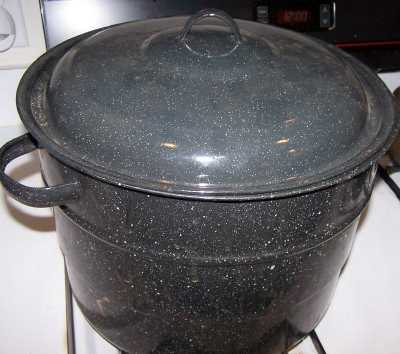
- 1 Water Bath Canner (a huge pot to sanitize the jars after filling (about $30 to $35 at mall kitchen stores, sometimes at big box stores and grocery stores.). Note: we sell canners and supplies here, too - at excellent prices - and it helps support this web site!
- all jars (Grocery stores, like Publix, Kroger, Safeway carry them, as do some big box stores - about $7 per dozen 8 ounce jars including the lids and rings)
- Jar funnel ($5 at Target, other big box stores, and often grocery stores; and available online - see this page) or order it as part of the kit with the Jar grabber .
- Jar grabber (to pick up the hot jars)- Big box stores and
grocery stores sometimes carry them; and it is available online - see
this page. It's a tremendously useful to put jars in the canner
and take the hot jars out (without scalding yourself!). The kit sold
below has everything you need, and at a pretty good price:
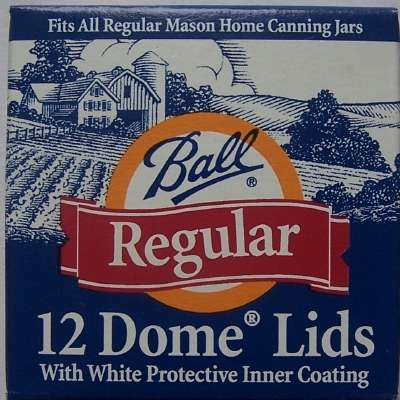
See here for related tools, equipment, supplies on Amazon - Lids - thin, flat, round metal lids with a gum binder that seals them against the top of the jar. They may only be used once.
- Rings - metal bands that secure the lids to the jars. They may be reused many times.
Optional stuff:
- Foley Food Mill - not necessary; useful if you want to remove seeds (from blackberries) or make applesauce.
- Lid lifter (has a magnet to pick the lids out of the almost-boiling water where you sanitize them. ($4 at big box stores or it comes in the kit at left)
Fig Jam-making Directions
This example shows you how to make fig jam; regular or with added seasoning. The yield from this recipe is about 7 eight-ounce jars (which is the same as 3.5 pints).
 Step
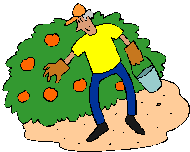
1 - Pick the figs! (or buy them already picked)
Step
1 - Pick the figs! (or buy them already picked)
It's fun to go pick your own and you can obviously get better quality ones!
At right is a picture I took of figs from my own tree - these are a variety called Celeste - see this page for more information on various types of figs, how to select the variety and how to pick them!
To pick your own, here is a list and links to the pick your own farms. just select your area!
FYI, Figs are REALLY easy to grow and also make an attractive landscaping tree!
Step 2 - How much fruit?
 Jam can ONLY be made in rather small batches - up to about 6 cups at a
time, DO NOT increase the recipes
or the jam won't "set" (gel, thicken). It takes about 5 to 6 lbs or
roughly 30 medium to large figs to produce the 5 cups of prepared
(peeled, sliced or chopped) fig pulp to make 1 batch of fig jam, yielding
7 jars, each 8 ounces in size.
Jam can ONLY be made in rather small batches - up to about 6 cups at a
time, DO NOT increase the recipes
or the jam won't "set" (gel, thicken). It takes about 5 to 6 lbs or
roughly 30 medium to large figs to produce the 5 cups of prepared
(peeled, sliced or chopped) fig pulp to make 1 batch of fig jam, yielding
7 jars, each 8 ounces in size.
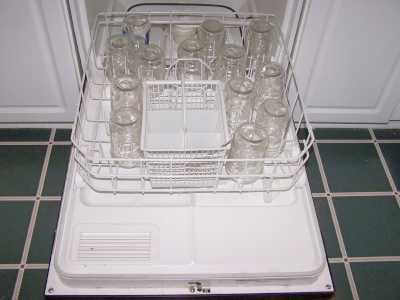 Step
3 - Wash the jars and lids
Step
3 - Wash the jars and lids
Now's a good time to get the jars ready, so you won't be rushed later. The dishwasher is fine for the jars; especially if it has a "sanitize" cycle, the water bath processing will sanitize them as well as the contents! If you don't have a dishwasher with a sanitize cycle, you can wash the containers in hot, soapy water and rinse, then sanitize the jars by boiling them 10 minutes, and keep the jars in hot water until they are used.
NOTE: If a canning recipe calls for 10 minutes or more of process time in the canner, then the jars do not need to be "sanitized" before filling them. But really, sanitizing them first is just good hygeine and common sense! See this page for more detail about cleaning and sanitizing jars and lids.
Put the lids into a pan of hot, but not quite boiling water (that's what the manufacturer's recommend) for 10 minutes, and use the magnetic "lid lifter wand" to pull them out.
Leave the jars in the dishwasher on "heated dry" until you are ready to use them. Keeping them hot will prevent the jars from breaking when you fill them with the hot jam. Some newer dishwashers even have a "sanitize" setting.
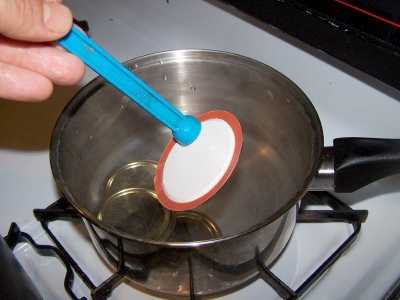
Step 4 - Get the lids warming in hot (but not boiling) water
Lids: put the very hot (but not quite boiling; around 180 F, steaming water is fine)
water (or on the stove in a pot
of water on low heat) for at least several minutes; to soften up the gummed
surface and clean and sanitize the lids.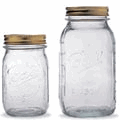
 Need
lids, rings and replacement jars?
Need
lids, rings and replacement jars?
Get them all here, delivered direct to your home, at the best prices on the internet!
 Step
5 -Wash and cut up the figs!
Step
5 -Wash and cut up the figs!
I'm sure you can figure out how to gently wash the fruit in plain cold water.
You need to cut off the stems and the bottom of the
fig, but you do not need to peel them - you CAN peel them if you want to.
I only peel the grody* looking ones (example photo below)
(* knarly, gross, yucky)

At left, sample figs with unappealing peels (skins). If the skin looks fine, I chop it up, but if the skins are tough, think or unappealing like these...

I peel ----->
 At
left is a sample slice of a perfectly ripe but not over-ripe fig. It
depends on the variety, but generally, they should be pink/yellowish and not
brown inside....
At
left is a sample slice of a perfectly ripe but not over-ripe fig. It
depends on the variety, but generally, they should be pink/yellowish and not
brown inside....
Some recipes call for the figs to sit in boiling water for 5 to 15 minutes to "check or tenderize the skins. Since the skins have no flavor, I'd rather remove them if they are thick or tough... otherwise, just chop them up along with the rest of the fig.
 You will need 4 to 5 cups (maximum 6 cups) of crushed figs. You will notice, I just
heap them in a 4-cup measuring cup, to account for the air spaces. That's
about 5 cups, probably only 4 if I crushed them and packed them down more.
It doesn't need to be precise.
You will need 4 to 5 cups (maximum 6 cups) of crushed figs. You will notice, I just
heap them in a 4-cup measuring cup, to account for the air spaces. That's
about 5 cups, probably only 4 if I crushed them and packed them down more.
It doesn't need to be precise.
You can chop them up more, if you like, but I find they soften and break up
during cooking, and if I want smaller pieces,
 I
just use a sharp-edged plastic potato masher (shown at right) to mush them
while cooking)
I
just use a sharp-edged plastic potato masher (shown at right) to mush them
while cooking)
Step 6 - Mix the figs with the sugar and water in a large pot and bring to a boil, slowly

 Mix the figs (4 to
6 cups), water (1/2 cup) and
sugar (6 cups) in the pot on the stove and get it simmering, stirring
until the sugar has dissolved.
Mix the figs (4 to
6 cups), water (1/2 cup) and
sugar (6 cups) in the pot on the stove and get it simmering, stirring
until the sugar has dissolved.
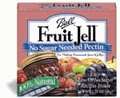
Is your jam too runny? Pectin enables you to turn out perfectly set jam every time. Made from natural apples, there are also natural no-sugar pectins that allow you to reduce the sugar you add by half or even eliminate sugar!
Get canning jars, rings, lids and pectin deliverd:
Step
7 - Once the sugar has dissolved, increase the heat to bring to boil that
reached the gelling point (around 180 F)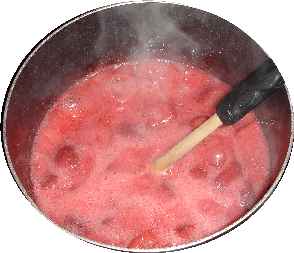
As the mixture thickens, keep stirring or it will burn. When it starts to thicken (maybe 10 minutes in), add the lemon juice. It can take a while (15 - 30 minutes to gently boil off enough water and reach the temperature required for a gel. You can take the temperature of the jelly with a candy or jelly thermometer. When the jam is ready, the temperature of should be 220°F. See the next step for details of determining when the jam is done.
 Step
8 - Testing for "jell" (thickness)
Step
8 - Testing for "jell" (thickness)
I keep a metal tablespoon sitting in a glass of ice water, then take a half spoonful of the mix and let it cool to room temperature on the spoon. If it thickens up to the consistency I like, then I know the jam is ready. If not, let it cook longer, get hotter. Get a few jars out of the dishwasher (still hot) and get your funnel, lid lifter and ladle ready. I put an old towel down - it makes cleanup easier.
If the jam is "gelling", take it off the heat. If not keep going.
If you have a candy thermometer you can take the temperature of the jam (but I find the spoon method above is pretty reliable).
For an accurate thermometer reading, place the thermometer in a vertical position and read at eye level. The bulb of the thermometer must be completely covered with the jelly but must not touch the bottom of the saucepot. (Remember to test the accuracy of the thermometer by placing it in boiling water.)
NOTE: to those who are substantially above sea level:
you want 8°F above the boiling point of water at your altitude.
For each 1000 feet of altitude above sea level, subtract 2 degrees F. For
instance, at 1,000 feet of altitude, the jelly is done at 218°F; at 2,000
feet, 216°F, etc.
Step 9 - Skim any excessive foam
 Foam...
What is it? Just jam with a lot of air from the boiling.
Foam...
What is it? Just jam with a lot of air from the boiling.  But it tastes more like, well, foam, that jam, so most people remove it.
It is harmless, though. Some people add 1 teaspoon of butter or margarine
to the mix in step 6 to reduce foaming, but food experts debate whether that may
contribute to earlier spoilage, so I usually omit it and skim.
But it tastes more like, well, foam, that jam, so most people remove it.
It is harmless, though. Some people add 1 teaspoon of butter or margarine
to the mix in step 6 to reduce foaming, but food experts debate whether that may
contribute to earlier spoilage, so I usually omit it and skim.
But save the skimmed foam! You can recover jam from it to use fresh! See this page for directions!
Step 10 - Fill the jars and put the lid and rings on
 Fill them to within 1/4-inch of the top, wipe any spilled jam off the
top, seat the lid and tighten the ring around them.
Fill them to within 1/4-inch of the top, wipe any spilled jam off the
top, seat the lid and tighten the ring around them.
 This
is where the jar tongs and lid lifter come in really handy!
This
is where the jar tongs and lid lifter come in really handy!

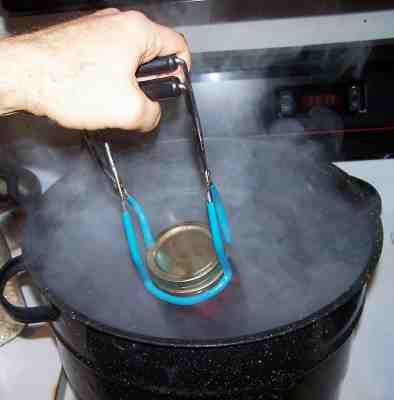 Step
11 - Process the jars in the boiling water bath
Step
11 - Process the jars in the boiling water bath
Keep the jars covered with at least 2 inches of water. Keep the water
boiling. In general, boil them for 5 minutes. I say "in general"
because you have to process (boil) them longer at higher altitudes than sea
level, or if you use larger jars, or if you did not
 sanitize
the jars and lids right before using them. The directions inside every
box of pectin will tell you exactly. The directions on the pectin tend
to be pretty conservative. Clemson University says you only need to
process them for 5 minutes. I usually hedge my bets and start pulling
them out after 7 minutes, and the last jars were probably in for 10. I
rarely have a jar spoil, so it must work.
sanitize
the jars and lids right before using them. The directions inside every
box of pectin will tell you exactly. The directions on the pectin tend
to be pretty conservative. Clemson University says you only need to
process them for 5 minutes. I usually hedge my bets and start pulling
them out after 7 minutes, and the last jars were probably in for 10. I
rarely have a jar spoil, so it must work.
Note: Some people don't even boil the jars; they just ladle it hot into hot jars, but putting the jars in the boiling water bath REALLY helps to reduce spoilage! To me, it makes little sense to put all the working into making the jam and then not to process the jars to be sure they don't spoil!
 Step
12 - Remove and cool the jars - Done!
Step
12 - Remove and cool the jars - Done!
Lift the jars out of the water and let them cool without touching or bumping them in a draft-free place (usually takes overnight) You can then remove the rings if you like, but if you leave them on, at least loosen them quite a bit, so they don't rust in place due to trapped moisture. Once the jars are cool, you can check that they are sealed verifying that the lid has been sucked down. Just press in the center, gently, with your finger. If it pops up and down (often making a popping sound), it is not sealed. If you put the jar in the refrigerator right away, you can still use it. Some people replace the lid and reprocess the jar, then that's a bit iffy. If you heat the contents back up, re-jar them (with a new lid) and the full time in the canner, it's usually ok.
Once cooled, they're ready to store. I find they last about 18 months. After that, the get darker in color and start to get runny. They still seem safe to eat, but the flavor is bland. So eat them in the first 12 to 18 months after you prepare them!
Other Equipment:From left to right:
|
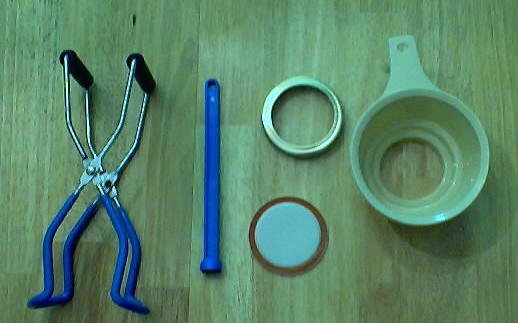 You can get all of the tools in a kit here: See here for related tools, equipment, supplies on Amazon |
Summary - Cost of Making Homemade Fig Jam - makes 7 jars, 8 oz each** |
||||
| Item | Quantity | Cost in 2026 | Source | Subtotal |
| Figs | 5 lbs (about 1 gallon) | $9.00/gallon | Pick your own | $10.00 |
| Canning jars (8 oz size), includes lids and rings | 7 jars | $11/dozen 8 oz jars or $0.92/jar12.00 |
Grocery stores, like Public, Kroger, Safeway and sometimes, Big Lots, local hardware stores and big box stores | $5.00 |
| Sugar | 6 cups | $2.50 | Grocery stores, like Public, Kroger, Safeway and sometimes, Big Lots, local hardware stores and big box stores | $2.50 |
| Lemon juice | 1/4 cup | .50 | Grocery stores, like Public, Kroger, Safeway | $0.50 |
| Total | $18.00 total or about $2.57 per jar |
|||
|
* - This assumes you already have the pots, pans, ladles,, and reusable equipment. Note that you can reuse the jars! If you already have jars or reuse them, just buy new lids (the rings are reusable, but the flat lids are not)! |
||||
Can't find the equipment? We ship to all 50 states!
Use our Feedback form!
Answers to Common Questions
Comments, Tips and Feedback:
|
Picking Tips
[General picking tips and a guide to each fruit and vegetable] [How
much do I need to pick?
(Yields - how much raw makes how much cooked or frozen)] [Selecting
the right varieties to pick] [All
about apple varieties - which to pick and why!] [Picking tips for Vegetables]
[ Strawberry picking tips]
[ Blueberries picking tips]
Illustrated Canning, Freezing, Jam Instructions and Recipes
[ All About Home Canning, Freezing and Making Jams, Pickles, Sauces, etc. ] [FAQs - Answers to common questions and problems] [Recommended books about home canning, jam making, drying and preserving!] [Free canning publications to download and print]
