

How to Make Homemade Blueberry Butter - Easily! With Step-by-step Photos, Recipe, Directions, Ingredients and Costs
This month's notes: July 2026: Stored US apples are still available. See your state's crop availability calendar for more specific dates of upcoming crops.
Valentine's Day - February 14 - See this website for Valentines Day history, facts and top picks for fast, easy, inexpensive gifts for the man, woman or children in your life!
Easter will be April 16, 2017 - if you want to take your children to a free Easter egg hunt - see our companion website to find a local Easter Egg hunt!
And we have home canning, preserving, drying and freezing directions. You can access recipes and other resources from the drop down menus at the top of the page or the site search. If you have any questions or suggestions, feel free to write me! Also make your own ice cream; see How to make ice cream and ice cream making equipment and manuals. Have fun, eat healthier and better tasting, and save money by picking your own locally grown fruit and vegetables, and then using our easy directions
 Subscribe
to our: Email
alerts; Follow us on Twitter
Add
this page to your favorites! -
Email this page to a friend, or to yourself
Subscribe
to our: Email
alerts; Follow us on Twitter
Add
this page to your favorites! -
Email this page to a friend, or to yourself
How to Make Homemade Blueberry Butter - Easily!
Click here for a PDF print version!
 Making
and canning your own blueberry butter is so easy. If you like blueberries,
and like the smooth texture and flavor of fruit butters, like peach butter
and apple butter, then you will love blueberry butter. Here's how to make it,
in 12 simple steps and completely illustrated.
Making
and canning your own blueberry butter is so easy. If you like blueberries,
and like the smooth texture and flavor of fruit butters, like peach butter
and apple butter, then you will love blueberry butter. Here's how to make it,
in 12 simple steps and completely illustrated.
For more information about blueberries, see Blueberry Picking Tips
For jams (strawberry, blackberry, peach, raspberry, etc.) click here, and for easy applesauce or apple butter directions, click on these links. And here are simple directions to make blueberry desserts: cobbler, coffee cakes / buckles and pie!
Ingredients
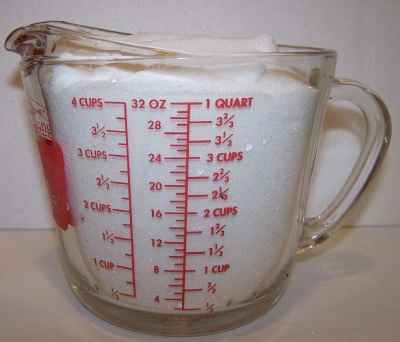
- Blueberries - 5 pints (which is: 10 cups, or 2.25 liters,
about 3.5 lbs, almost 1.75 kg) preferably fresh, but frozen (without
syrup works, too)

- Lemon juice - either fresh squeezed or bottled. 1/4 cup.
- Water - 1/2 cup
- Sugar - See step 6. My favorite is the low sugar formula, using about 4.5 cups of dry, granulated (table) sugar. It is possible to make low-sugar, fruit juice-sweetened, or Stevia (in a prepared form like Truvia, it measures same as sugar; if you use another form, you will need do your own conversion) - or Splenda, if you prefer, -sweetened blueberry butter; I'll point out the differences below.
- Seasoning - 1 teaspoon of ground cinnamon and 1/4 teaspoon of ground cloves
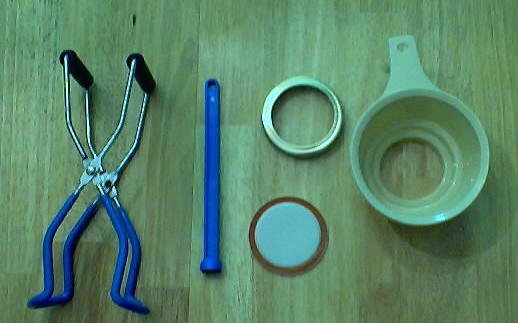
Equipment
- Jar funnel ($5 at Target, other big box stores, and often grocery stores; and available online - see this page) or order it as part of the kit with the Jar grabber .
- At least 1 large pot; I prefer 16 to 20 quart Nonstick ceramic coated pots for easy cleanup.
- Large spoons and ladles,
- 1 Water Bath Canner (a huge pot to sanitize the jars after filling (about $30 to $35 at mall kitchen stores, sometimes at big box stores and grocery stores.). Note: we sell canners and supplies here, too - at excellent prices - and it helps support this web site!
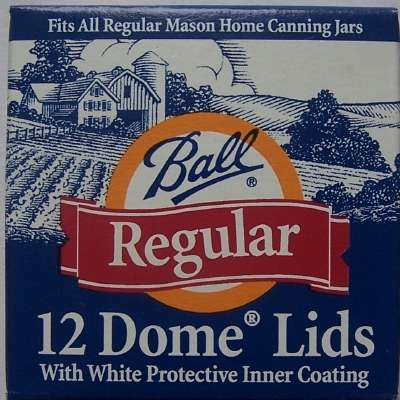
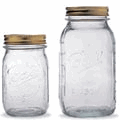
- Half pint canning jars (Grocery stores, like Publix, Kroger, Safeway carry them, as do some big box stores - about $7 per dozen 8 ounce jars including the lids and rings)
- Lids - thin, flat, round metal lids with a gum binder that seals them against the top of the jar. They may only be used once.
- Rings - metal bands that secure the lids to the jars. They may be reused many times.
- Jar grabber (to pick up the hot jars)- Big box stores and
grocery stores sometimes carry them; and it is available online - see
this page. It's a tremendously useful to put jars in the canner and take
the hot jars out (without scalding yourself!). The kit sold below has
everything you need, and at a pretty good price:
See here for the Canning set and pickling kit including the jar grabber on Amazon - Lid lifter (has a magnet to pick the lids out of the almost-boiling water where you sanitize them. ($4 at big box stores or it comes in the kit at left)
Optional stuff:
Blueberry Butter-Making Directions
This example shows you how to make blueberry butter! The yield from this recipe is about 5 eight-ounce jars.
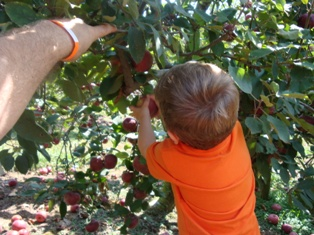
Step 1 - Pick the blueberries! (or buy them already picked)
It's fun to go pick your own and you can obviously get better quality ones!
I prefer to grow my own; which is really easy - but that does take
some space and time.
As mentioned in the Ingredients section; you may use frozen blueberries (those without syrup or added sugar); which is especially useful if you want to make some butter in December to give away at Christmas!
At left are blueberries (in my yard, actually; they make a great hedge or landscaping bush) almost ripe! If you want to pick your own, here is a list and links to the pick your own farms.
Step 2 - How much fruit?
 It
takes about 10 cups of raw, unprepared blueberries per batch to make about
3 cups of blueberry butter. Between the air spaces in loose blueberries
and the fact that it cooks down by about 1/3; the final result is half of
the loose berries; for each cup of berries you start with, you will end up with 1/2 cup of blueberry butter.
It
takes about 10 cups of raw, unprepared blueberries per batch to make about
3 cups of blueberry butter. Between the air spaces in loose blueberries
and the fact that it cooks down by about 1/3; the final result is half of
the loose berries; for each cup of berries you start with, you will end up with 1/2 cup of blueberry butter.
Step 3 - Wash the jars and lids
Now's a good time to get the jars ready, so you won't be rushed later. The dishwasher is fine for the jars; especially if it has a "sanitize" cycle, the water bath processing will sanitize them as well as the contents! If you don't have a dishwasher with a sanitize cycle, you can wash the containers in hot, soapy water and rinse, then sanitize the jars by boiling them 10 minutes, and keep the jars in hot water until they are used.
Canning jars in the dishwasherNOTE: If unsanitized jars are used, the product should be processed for 10 more minutes. However, since this additional processing can result in a poor set (runny blueberry butter), it's better to sanitize the jars.
Put the lids into a pan of hot, but not quite boiling water (that's what the manufacturer's recommend) for 10 minutes, and use the magnetic "lid lifter wand" to pull them out.
Leave the jars in the dishwasher on "heated dry" until you are ready to use them. Keeping them hot will prevent the jars from breaking when you fill them with the hot blueberry butter.
Need lids, rings and replacement jars?
Get them all here, delivered:
Lids: put the very hot (but not quite boiling; around 180 F, steaming
water is fine)
water for at least several minutes; to soften up the
gummed surface and clean the lids. I just leave them in there, with
the heat on very low, until I need them!
Step 4 -Wash the berries and sort!
 I'm
sure you can figure out how to wash the fruit in a colander of plain cold
water.
I'm
sure you can figure out how to wash the fruit in a colander of plain cold
water.
 Then
you need to pick out and remove any bits of stems, leaves and soft or
mushy berries. It is easiest to do this in a large bowl of water and
gently run your hands through the berries as they float. With your
fingers slightly apart, you will easily feel any soft or mushy berries get
caught in your fingers.
Then
you need to pick out and remove any bits of stems, leaves and soft or
mushy berries. It is easiest to do this in a large bowl of water and
gently run your hands through the berries as they float. With your
fingers slightly apart, you will easily feel any soft or mushy berries get
caught in your fingers.
Then just drain off the water!
Step 5 - Puree the berries

 The
easiest way to get a really smooth blueberry butter is to puree the
blueberries in a blender before cooking them. Alternatively, a
hand-held food blender in the hot cooked blueberries works, too, but the
risk of being burned by splattered hot blueberry puree is there.
The
easiest way to get a really smooth blueberry butter is to puree the
blueberries in a blender before cooking them. Alternatively, a
hand-held food blender in the hot cooked blueberries works, too, but the
risk of being burned by splattered hot blueberry puree is there.
If you don't have a blender, you can hand mash them (see photo at left), but it won't be anywhere as smooth!
Either way, if you start with 10 pints of berries, you will end up with about 6.5 cups of blueberry puree.
Step 6 - Measure out the sweetener
Depending upon which type of blueberry butter you're making (sugar, no-sugar, Stevia (but you will have to experiment with amount, each brand of Stevia is a different concentration), or Splenda, or a mix of sugar and Stevia (or Splenda) or fruit juice - especially for those on sugar-restricted diets) you will need to use a different amount of sugar. You can also use honey instead! About 1 cup of honey per cup of sugar. I don't recommend using Stevia (in a prepared form like Truvia, it measures same as sugar; if you use another form, you will need do your own conversion) - or Splenda, if you prefer, by itself - plain old sugar makes a big difference in the color and taste. Unless you're diabetic, for best results, try the low or lower sugar formula below.
| Type of blueberry butter: | Amount and Type of Sweetener |
| regular (best results) | 7 cups of sugar (best results) |
| low sugar | 4.5 cups of sugar - works very well, almost as good as the full sugar version above |
| lower sugar | 2 cups sugar and 2 cups Splenda (or about 1/3 that if you use Stevia, which is my preference) |
| no sugar | 4 cups Splenda (or about 1/3 that if you use Stevia, which is my preference) |
| natural | 3 cups fruit juice (blueberry, grape, peach, apple or mixed) |
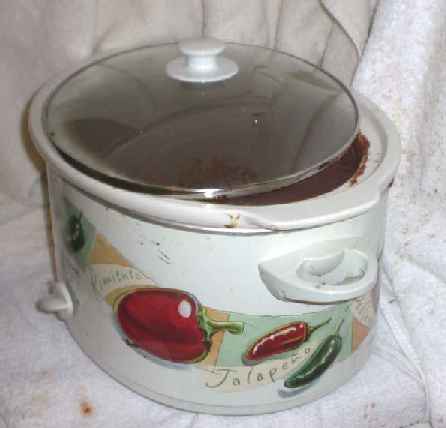
Step 7 - Fill the crock pot with the pureed blueberries, lemon juice and sugar
Fill the crock pot to within an inch of full with the blended blueberries. Now, you CAN do this using a regular large pot on very low heat on the stove, but the crockpot works much better, because its heat is very low. I've never had a batch burn in the crockpot.
 Add
the sugar (about 5 cups of sugar per 10 cup batch of blueberries) and turn
the heat on. I start with high, then change it to low once it gets
hot and starts to boil. You can taste and add more sugar later, if
you desire. Next, add the 1/4 cup of lemon juice - it helps to act as a
preservative by acidifying the butter.
Add
the sugar (about 5 cups of sugar per 10 cup batch of blueberries) and turn
the heat on. I start with high, then change it to low once it gets
hot and starts to boil. You can taste and add more sugar later, if
you desire. Next, add the 1/4 cup of lemon juice - it helps to act as a
preservative by acidifying the butter.
This is a good time to add any spices you want: Typically, people add a small amount of cinnamon and/or cloves; say 1 teaspoon of cinnamon and 1/4 teaspoon cloves.
Step 8 - Cook down the blueberry butter
 Before
you leave the crockpot unattended, set the crock pot on low or medium
heat.
Before
you leave the crockpot unattended, set the crock pot on low or medium
heat.
Cover it loosely or use a large pot splatter-guard. It will spatter as it boils slowly, so I also cover nearby surfaces with towels. You don't want to seal it tightly because you want the steam to escape so it can reduce in volume and thicken. A visitor suggests, take a couple of butter knives, and lay them across the top of the crock pot. They are parallel and located about 2/3 of the way out from the center. Then put the lid on these supports, leaving it "covering" the pot and keeping the splatters under control, but, leaving a good gap for steam to escape. I just made a batch and tried this approach, but I used a pair of wooden chopsticks or bamboo kebab skewers - they worked great!
Leave it to cook for 6 - 12 hours. How long depends on the size and power of your crockpot, and how thick you like it, If you want to stir it occasionally, that's fine but not necessary. I let mine go overnight, set on low.
When is it done? When it reaches the thickness you desire; that's all!
Step 9 - Blend the blueberry butter (optional)
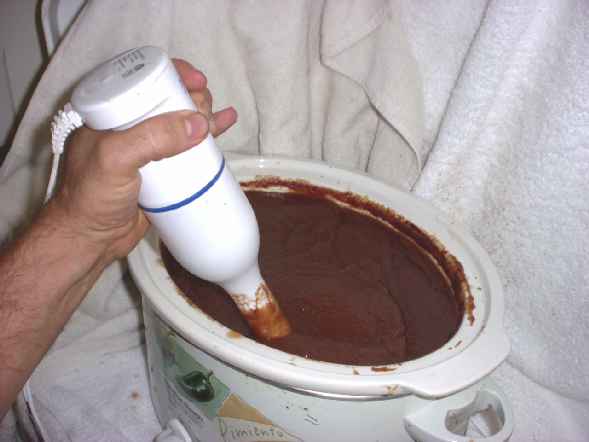 You
want a smooth, creamy texture, right? The easiest way is to use a
hand-held drink blender. It does a great job of making it smooth.
You can also put it into a regular blender, but if you are going to do
that, you might want to blend the blueberries before you put it in the
crock pot (it will be much thicker afterwards and won't move in a
regular blender). Another visitor says running it through a food mill
with a fine screen or through a sieve works, too.
You
want a smooth, creamy texture, right? The easiest way is to use a
hand-held drink blender. It does a great job of making it smooth.
You can also put it into a regular blender, but if you are going to do
that, you might want to blend the blueberries before you put it in the
crock pot (it will be much thicker afterwards and won't move in a
regular blender). Another visitor says running it through a food mill
with a fine screen or through a sieve works, too.
Tips:
- Too thick? if the blueberry butter cooks down too much or is too thick for your liking, just add a little bit of blueberry juice and blend it in.
- Not thick enough? Just let it cook some more, with the lid off so the steam can escape!
- Not sweet enough - add more sugar, honey or Stevia (in a prepared form like Truvia, it measures same as sugar; if you use another form, you will need do your own conversion) - or Splenda, if you prefer, , as you prefer.
Step 10 - Fill the jars and put the lid and rings on
 Fill
them to within 1/4-inch of the top, wipe any spilled butter off the top,
seat the lid and tighten the ring around them. Then put the filled jars into the canner!
Fill
them to within 1/4-inch of the top, wipe any spilled butter off the top,
seat the lid and tighten the ring around them. Then put the filled jars into the canner!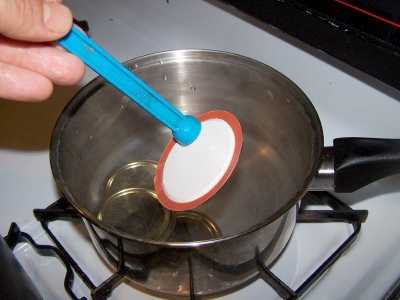
This is where the jar tongs and lid lifter come in really handy!
Step 11 - Process the jars in the boiling water bath
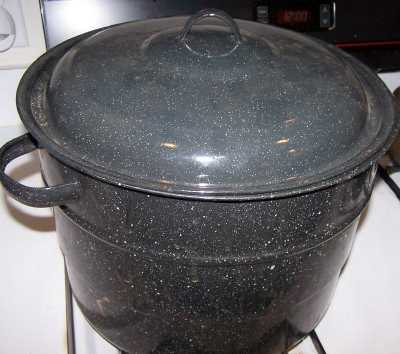 Keep
the jars covered with at least 2 inches of water. Keep the water
boiling. In general, boil them for 10 minutes. I say "in general"
because you have to process (boil) them longer at higher altitudes than
sea level, or if you use larger jars, or if you did not sanitize the
jars and lids right before using them. Clemson University says you
only need to process them for 5 minutes. I usually hedge my bets
and start pulling them out after 8 minutes, and the last jars were
probably in for 10. I rarely have a jar spoil, so it must work.
Keep
the jars covered with at least 2 inches of water. Keep the water
boiling. In general, boil them for 10 minutes. I say "in general"
because you have to process (boil) them longer at higher altitudes than
sea level, or if you use larger jars, or if you did not sanitize the
jars and lids right before using them. Clemson University says you
only need to process them for 5 minutes. I usually hedge my bets
and start pulling them out after 8 minutes, and the last jars were
probably in for 10. I rarely have a jar spoil, so it must work.
Note: Some people don't even boil the jars; they just ladle it hot into hot jars, put the lids and rings on and invert them, but putting the jars in the boiling water bath REALLY helps to reduce spoilage! To me, it makes little sense to put all the working into making the butter and then not to process the jars to be sure they don't spoil!
I you are at sea level (up to 1,000 ft) boil pint jars for 5 minutes and quart jars for 10 min. If you are at an altitude of 1,000 feet or more, see the chart below.
|
Recommended process time for Fruit Butters in a boiling-water canner. |
|||
|
Jar Size |
Process Time at Altitudes of |
||
|
|
0 - 1,000 ft |
1,001 - 6,000 ft |
Above 6,000 ft |
|
Half-pints or Pints |
5 min |
10 |
15 |
|
Quarts |
10 |
15 |
20 |
Step 12 - Done
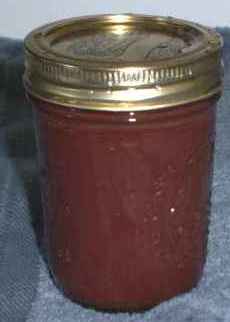 Lift
the jars out of the water and let them cool without touching or bumping
them in a draft-free place (usually takes overnight) You can then
remove the rings if you like, but if you leave them on, at least loosen
them quite a bit, so they don't rust in place due to trapped moisture.
Once the jars are cool, you can check that they are sealed verifying
that the lid has been sucked down. Just press in the center, gently,
with your finger. If it pops up and down (often making a popping sound),
it is not sealed. If you put the jar in the refrigerator right away, you
can still use it. Some people replace the lid and reprocess the jar,
then that's a bit iffy. If you heat the contents back up, re-jar them
(with a new lid) and the full time in the canner, it's usually ok.
Lift
the jars out of the water and let them cool without touching or bumping
them in a draft-free place (usually takes overnight) You can then
remove the rings if you like, but if you leave them on, at least loosen
them quite a bit, so they don't rust in place due to trapped moisture.
Once the jars are cool, you can check that they are sealed verifying
that the lid has been sucked down. Just press in the center, gently,
with your finger. If it pops up and down (often making a popping sound),
it is not sealed. If you put the jar in the refrigerator right away, you
can still use it. Some people replace the lid and reprocess the jar,
then that's a bit iffy. If you heat the contents back up, re-jar them
(with a new lid) and the full time in the canner, it's usually ok.
Other Equipment:From left to right:
|
 You can get all of the tools in a kit here: See here for related tools, equipment, supplies on Amazon |
Summary - Cost of Making Homemade Blueberry Butter - makes 10 jars, 8 oz each** |
||||
| Item | Quantity | Cost in 2026 | Source | Subtotal |
| Blueberries | 1 gallon | $11.00/gallon | Pick your own | $10.00 |
| Canning jars (8 oz size), includes lids and rings | 10 jars | $11/dozen 8 oz jars or $0.92/jar12.00 |
Grocery stores, like Public, Kroger, Safeway and sometimes, Big Lots, local hardware stores and big box stores | $6.00 |
| Sugar | 5 cups | $2.00 | Grocery stores, like Public, Kroger, Safeway and sometimes, Big Lots, local hardware stores and big box stores | $2.00 |
| Total | $18.00 total or about $1.80 per 8 oz jar |
|||
|
* - This assumes you already have the pots, pans, ladles,, and reusable equipment. Note that you can reuse the jars, and that reduces the cost! Just buy new lids (the rings are reusable, but the flat lids are not)! |
||||
Answers to Common Questions
|
Picking Tips
[General picking tips and a guide to each fruit and vegetable] [How
much do I need to pick?
(Yields - how much raw makes how much cooked or frozen)] [Selecting
the right varieties to pick] [All
about apple varieties - which to pick and why!] [Picking tips for Vegetables]
[ Strawberry picking tips]
[ Blueberries picking tips]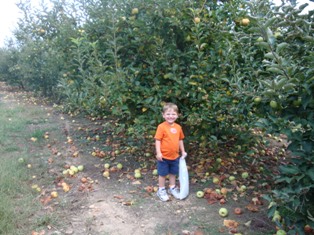
Illustrated Canning, Freezing, Jam Instructions and Recipes
[ All About Home Canning, Freezing and Making Jams, Pickles, Sauces, etc. ] [FAQs - Answers to common questions and problems] [Recommended books about home canning, jam making, drying and preserving!] [Free canning publications to download and print]
